I love to cook. I love being in the kitchen. It is my sanctuary. When we were looking for houses, the most important aspect I looked at was whether I liked the kitchen or not. While this certainly isn’t my dream kitchen, it did help sell the house to us. Not only does it have a gas stove, but it also has the perfect kitchen triangle (the stove, refrigerator, and sink are in a perfect triangle, making access to all of them quick and effortless while cooking).
I love to shop at Costco and I always need to have excess supplies on hand in case I get the desire to bake a cake or cookies at 10pm. But, I have the SMALLEST pantry ever. It is my least favorite part of our kitchen. It has been a struggle to not only fit all my dry goods in my small pantry closet, but to also make it organized and practical for everyday use.
I spent a lot of time staring at my pantry. And trying to organize. And then making it a mess again. And starting over. In the end, I think I came up with a great system that works for my small space.
And after all that, here are my tips on organizing your pantry and optimizing a small space:
1. Pull everything out of your pantry and deep clean the space. This would also be a good time to wallpaper the back wall of your pantry, for an extra pop of color (I did not do this, but I think I am putting it on my “to-do” list).
2. Check expiration dates and throw out anything that is expired. Donate items that you don’t think you will use.
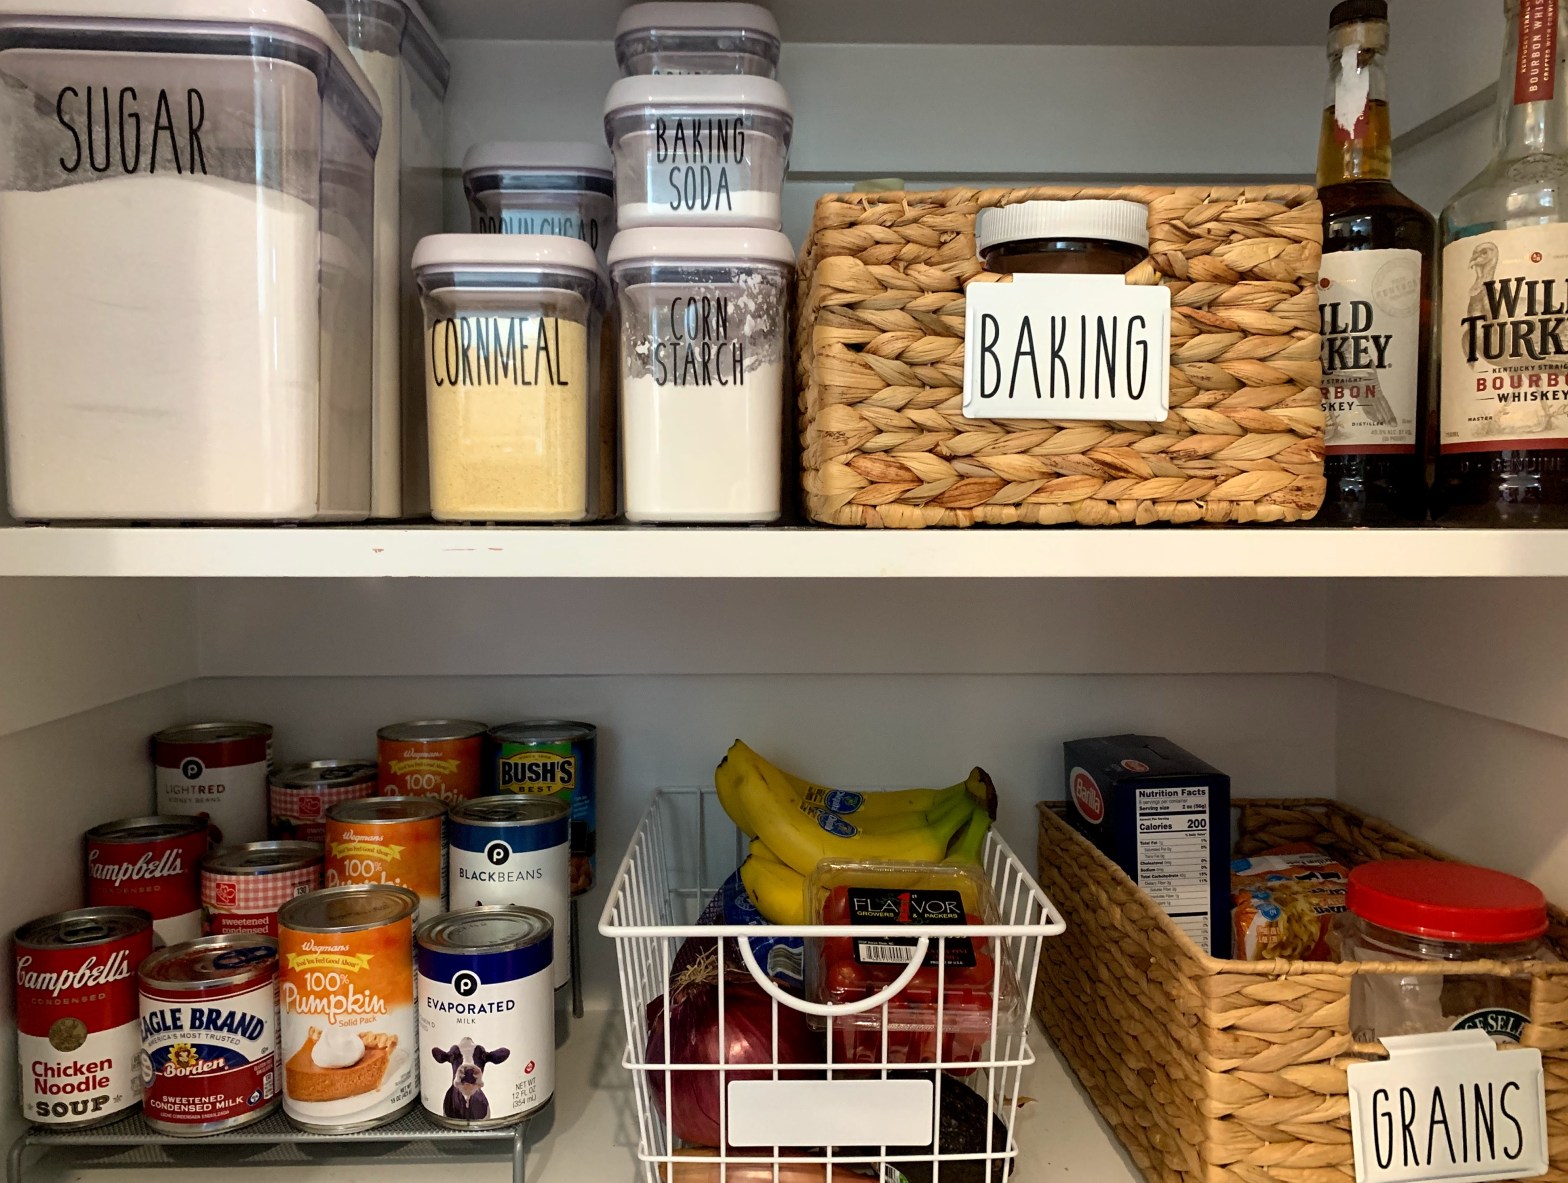
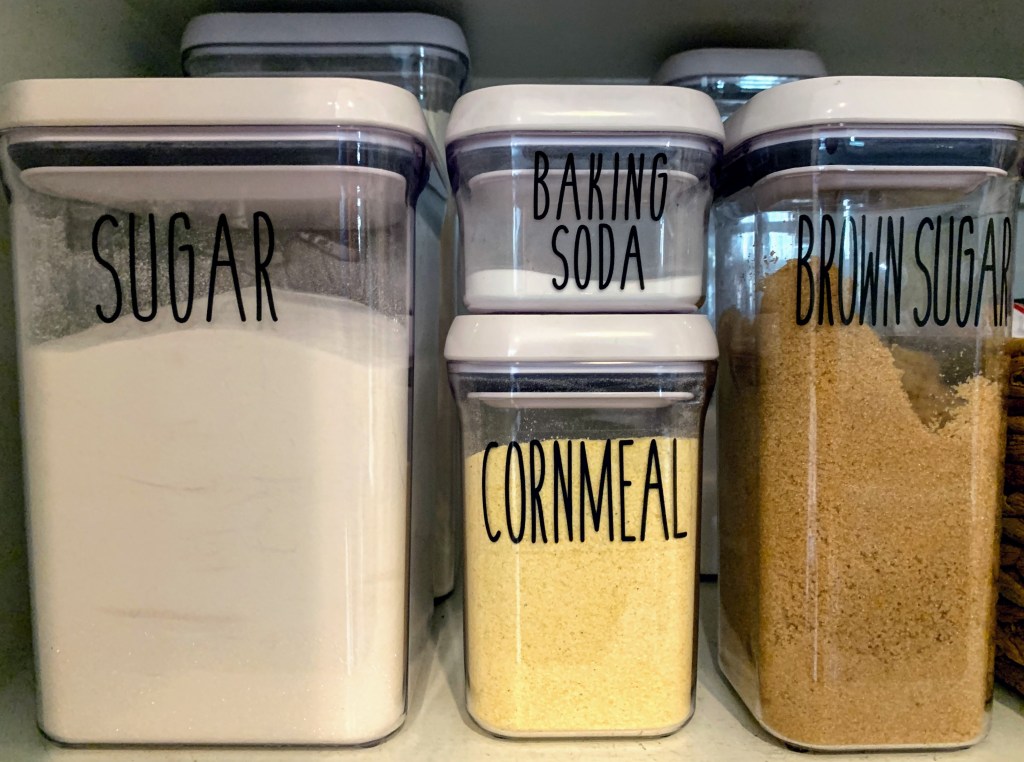
3. Pick a theme. I chose to do clear Pop containers and hyacinth baskets.
4. Consolidate. Any items that can be taken out of boxes can really help to optimize a small space
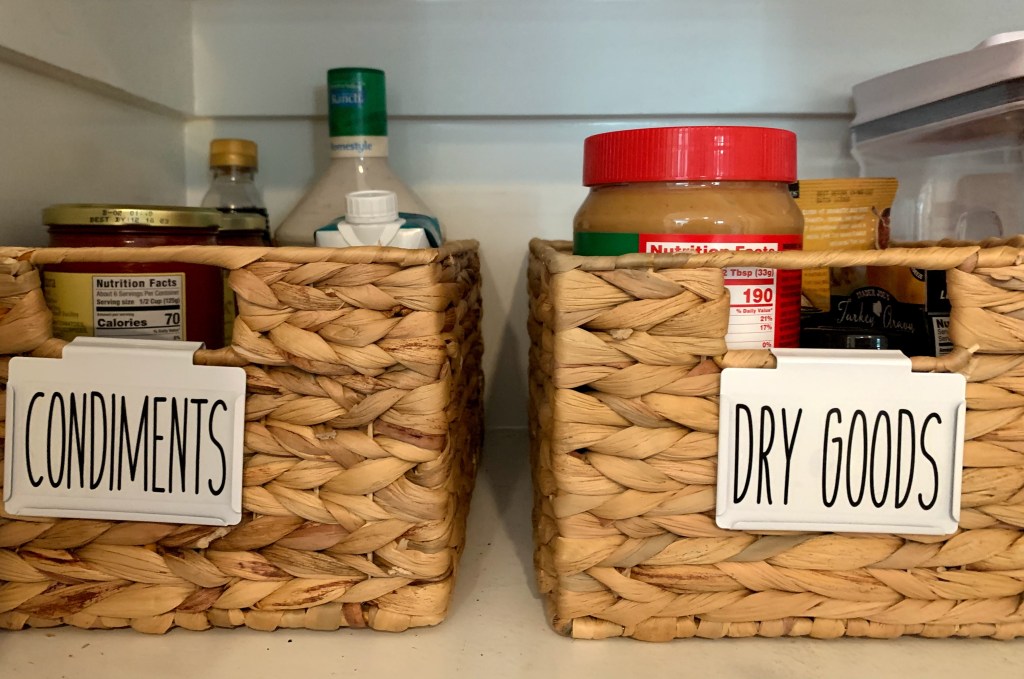
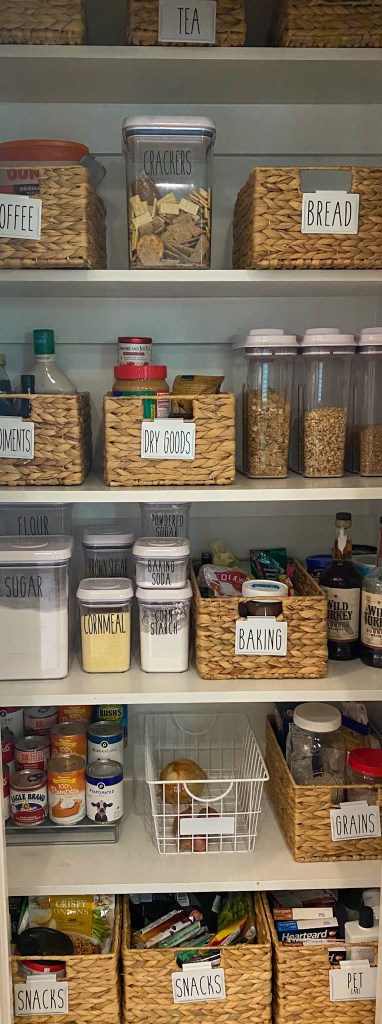
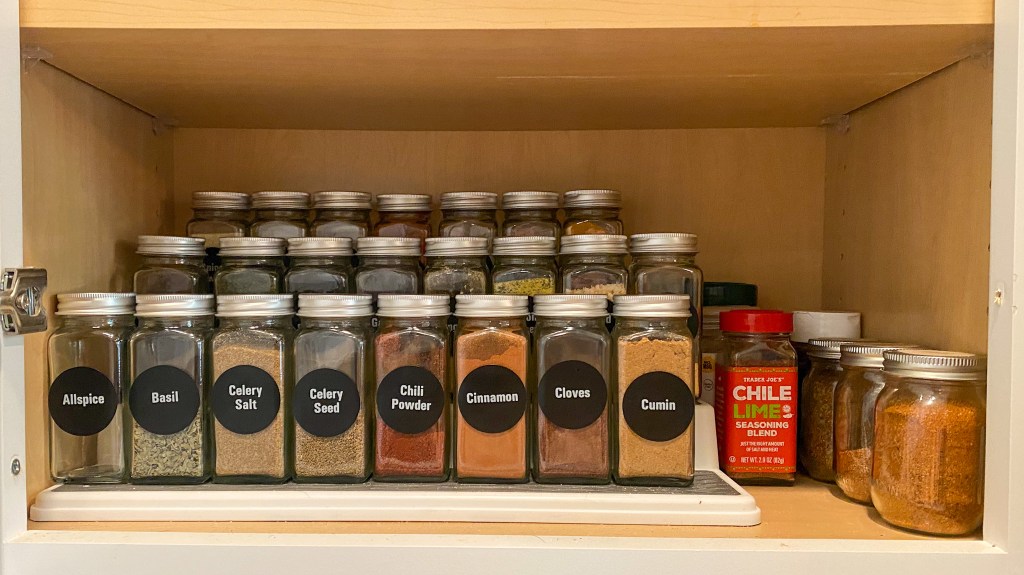
5. Organize first, label second. Obviously it is easy to organize dry goods into different containers, but when separating the rest of your pantry items sometimes it is hard to group them together, especially when you have a small space. I bought this label set that actually helped streamline the process for me when deciding what items would group well together. I also used these clip labels for the hyacinth baskets, since you can’t see through the baskets to tell what they contain.
6. Don’t over label. Too many labels on too many containers can make the space look more cluttered
7. Keep up with your organization. It is much easier to maintain a clean and organized space than it is to start from the beginning again. Take the extra effort each time you use your pantry or go grocery shopping to make sure you are maintaining the organization.
I love a good party. And there is no better excuse to throw a party than a baby! One of my best friends, Addy, is due in May. After suffering a miscarriage, I thought she deserved to be spoiled as much as possible for this pregnancy. After months of planning, I threw her the ultimate pandemic baby shower (complete with a zoom portion, of course). I am extremely type A and organized at baseline, but here is how the party planning and execution went.
The Theme
The first item on the agenda was to pick a theme. I gave Addy a bunch of ideas, and she decided on a simple “blue” theme. This was great in my book – the sky was the limit as far as decorations and food, all I had to do was make sure everything was blue!
The Decorations
Obviously I needed this party to have a good aesthetic. I am also cheap as s**t, but I hate tacky homemade things. I settled on a few DIY projects for the baby shower, and I think they turned out alright! Definitely a learning process, and there were certainly things I would re-do if I had the chance, but overall I think it was a success.
For the entrance, I made this “welcome” sign. I bought a large acrylic sheet off of Amazon, and a print out sign from Etsy. I traced the “Welcome to Addison’s Baby Shower” through the clear sheet with a gold and black paint pen, let it dry, then flipped it over and painted the back of the sign with blue and white acrylic paint. The biggest takeaway I learned was to use an oil-based paint pen for the gold and black lettering.
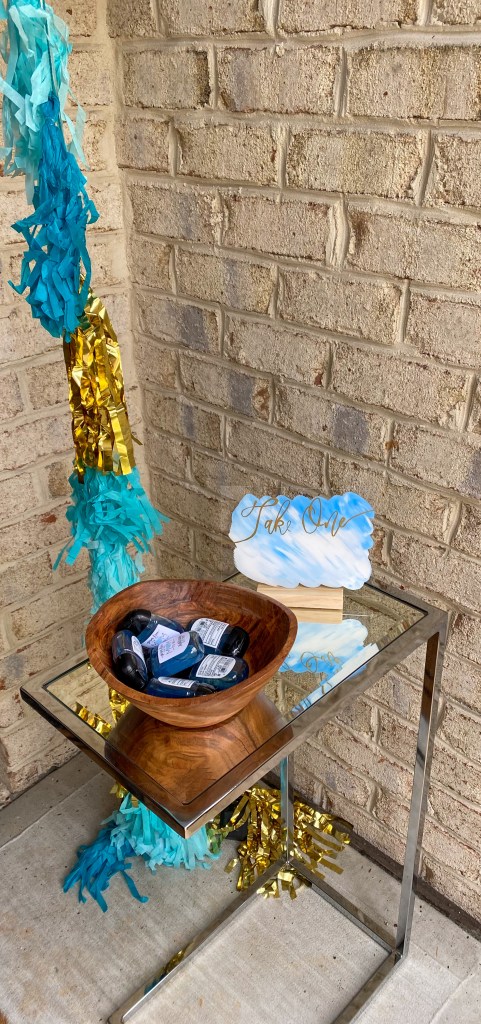
I also made a few smaller acrylic signs the same way – one for the gift table, one at the entrance saying “take one” of the hand sanitizers, and one for the champagne party favors.
The balloon arch was supposed to be the focal point of the whole baby shower, but damn if it wasn’t an Amazon fail! I thought I was ordering a pack with multiple shades of blue, white, and silver. Unfortunately that wasn’t the case. I tried to create a balloon arch that transitioned from blue – to white – to silver in an aesthetic way. I wasn’t very successful, but oh well. Next time! The biggest takeaway I have is to splurge the extra $20 to buy the balloon pump. My husband was extremely grateful he didn’t have to blow up all the balloons this time.
I purchased some 36 inch balloons off of Amazon, and had them filled with helium at our local Publix. I placed one at the front door and two by the balloon arch. I used two tissue paper tassel banners that I bought from Target to tie to the large balloons to add some flair, rather than just having them held by a string. If you ever buy these huge balloons and fill them up, be warned – they can’t be held down with a normal balloon weight. These all ended up at the top of the 20 ft ceiling at one point.
Finally, I set up the “present-opening” station with a blue chair I already had, and a classic “oh baby” sign.
The Favors
You can’t have a pandemic-era baby without hand sanitizer at the shower. I placed these individual hand sanitizers by the entrance sign. I purchased the hand sanitizers from Bath and Body Works, and then found the sticker labels on Etsy.
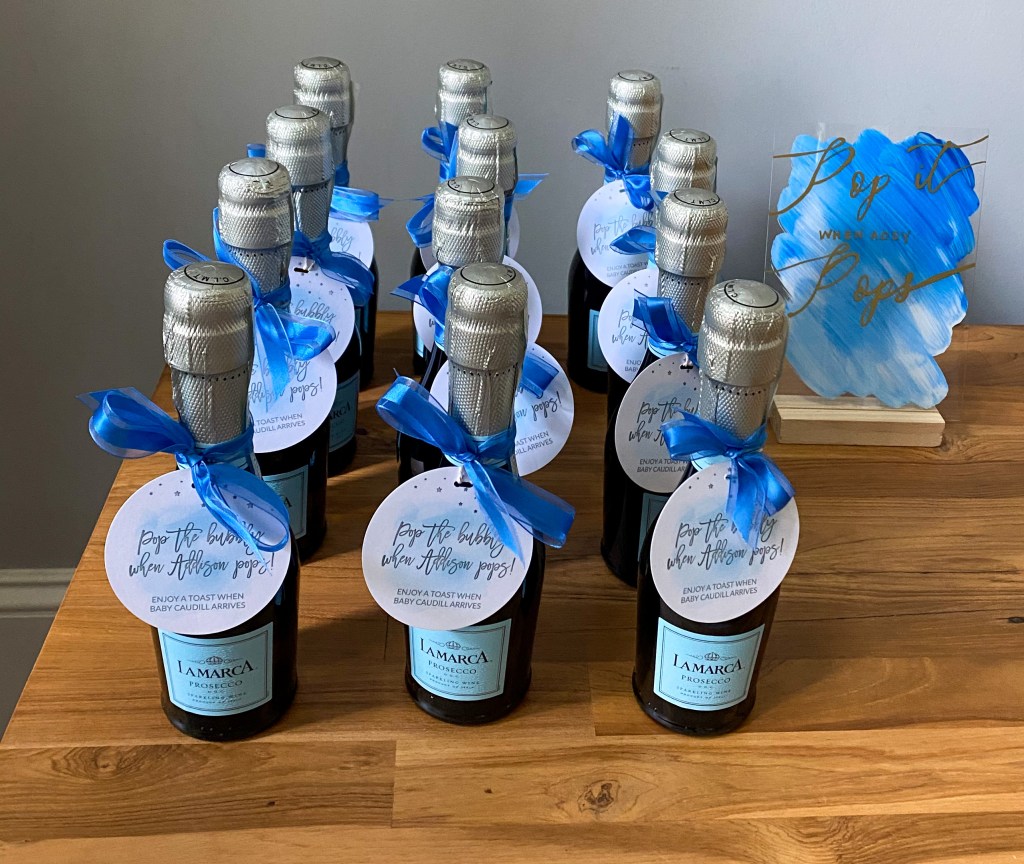
I also purchased these “Pop it When She Pops” tags from Etsy, and tied them to individual champagne bottles. Obviously I used LaMarca because of their blue labels.
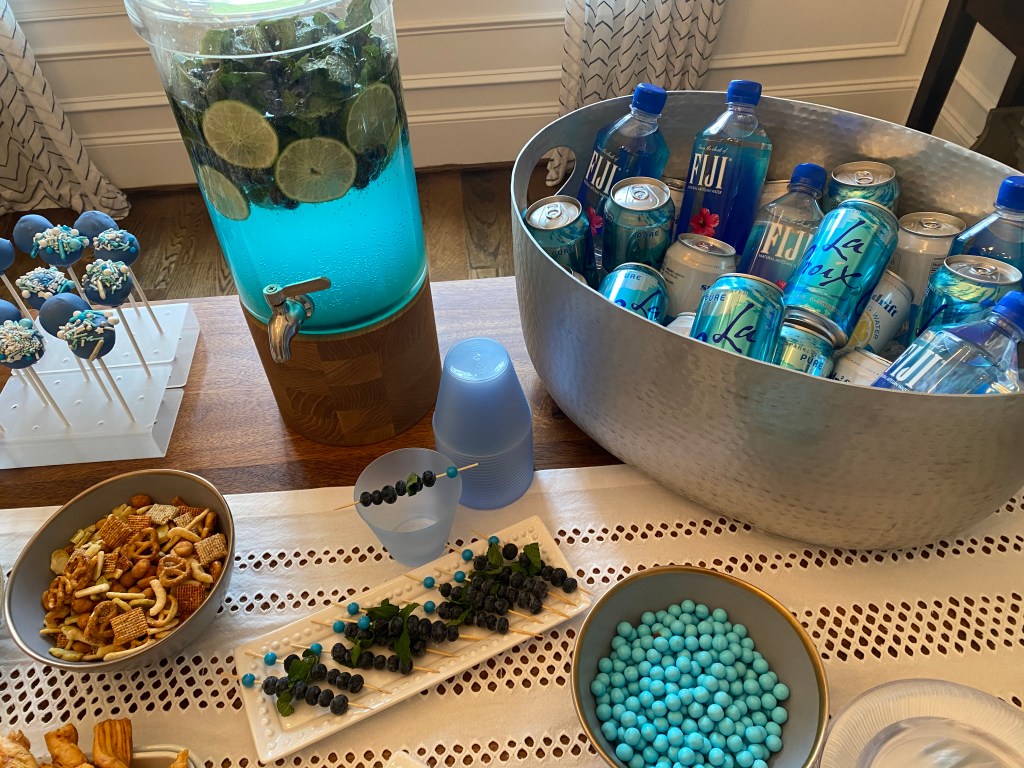
The Drinks
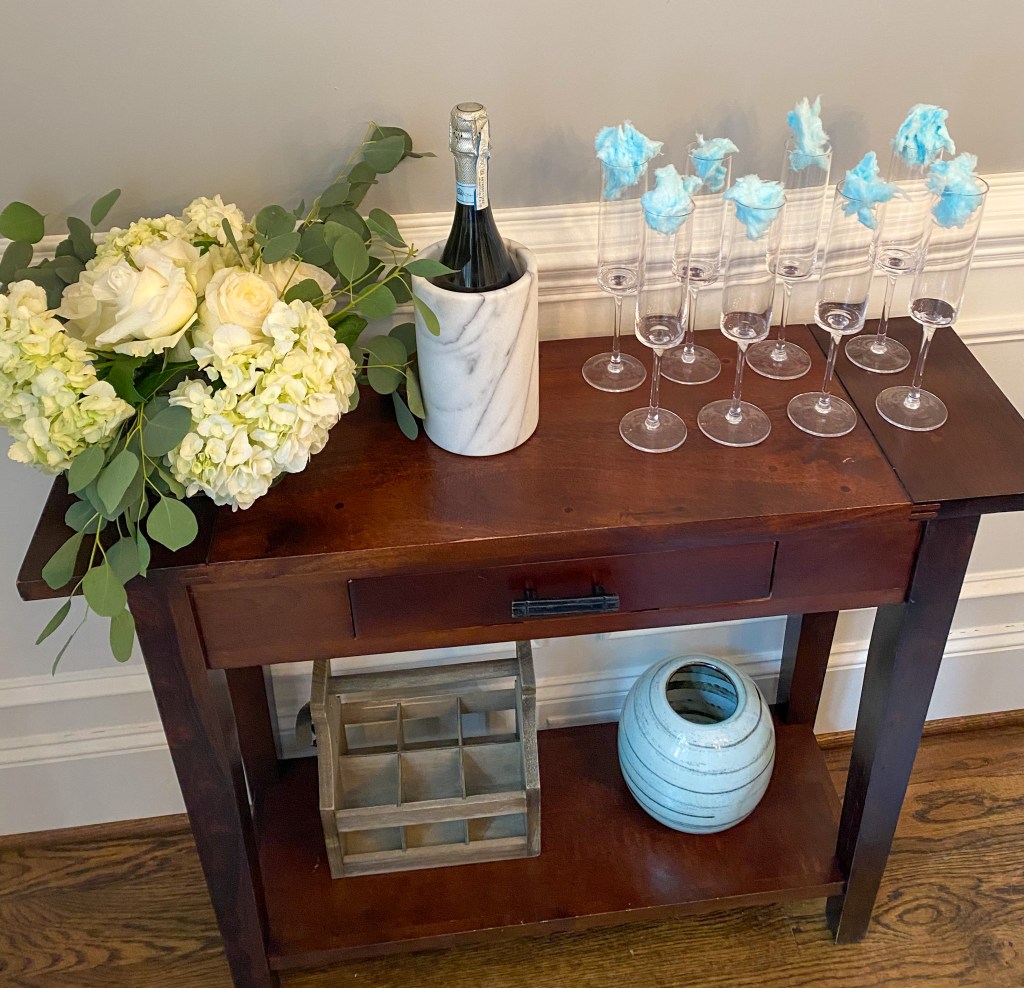
Sticking true to the blue theme, I used La Marca Prosecco for the alcoholic beverages. I stuck blue cotton candy in champagne glasses and poured the champagne over it to create a blue drink. The best part – you couldn’t taste the flavor of the cotton candy. You could also do edible blue glitter as another option here.
I wanted to make a special non-alcoholic drink as well, since the mom-to-be obviously wasn’t drinking. I opted for a virgin blueberry mojito. I muddled limes and fresh mint together, and let them sit overnight in a container of plain water. For the party, I placed that mixture in a dispenser with blueberries and plain seltzer. In order to make the drink blue, I added a few drops of food coloring. In hindsight, I should have used a deeper color blue food coloring, or I think it also would have been fine without any color at all. I also stuck blueberries and mint on toothpicks as garnish for the mocktail.
And finally, I purchased seltzers and plain waters with blue labels and placed them in an ice bin. I had to stick true to the theme!
The Food
And last, you can’t have a good party without a plethora of food. My motto – when in doubt, make more.
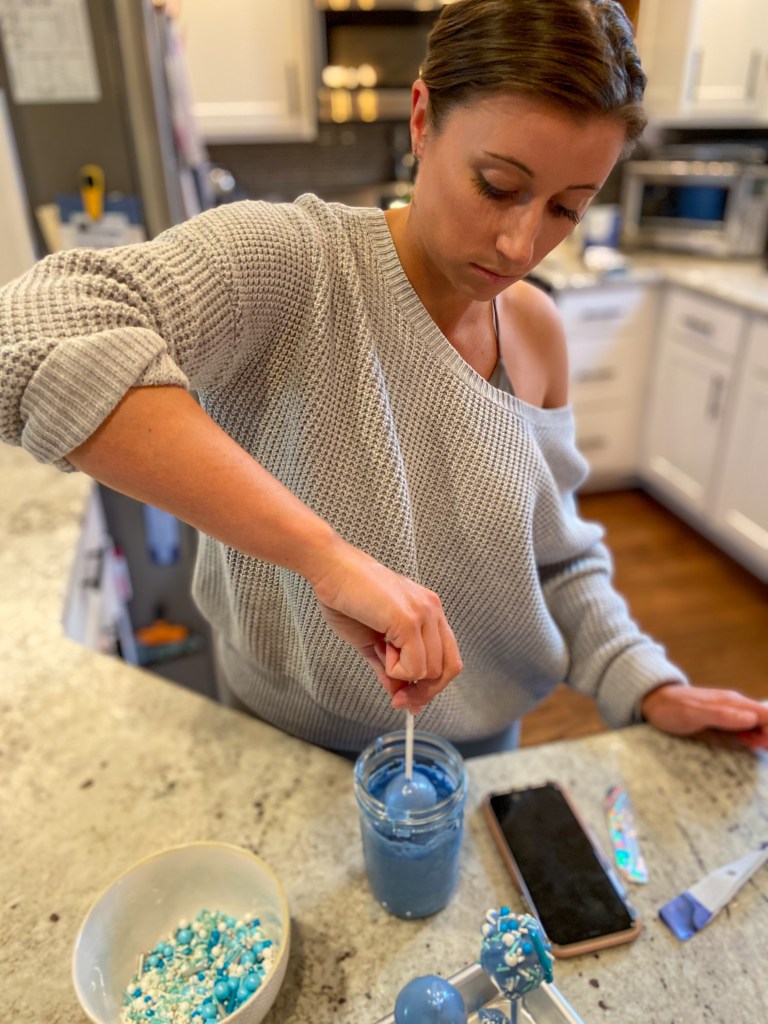
I started with a bunch of blue colored candies. I also purchased some baby shower themed cookies from Etsy – they arrived the day before the shower and tasted great! For the last dessert, I made cake pops. In hindsight I should have just made a normal cake, but these turned out pretty decent (if you don’t count the rejects that didn’t make the final cut).
To create the cake pops, I first baked a plain chocolate cake and whipped up some chocolate icing. Once the cake was cool, I mixed the cake and icing together with the Kitchenaid Mixer until the mixture resembled a dough. I rolled the “dough” into balls, and then froze them for 30-60 minutes. Once the balls were firm, I stuck cake pop sticks into them, and returned them to the freezer. Once those were frozen, I dipped them into a mixture of melted white chocolate + blue chocolate melts. I placed the melted chocolate into a mason jar to create a deeper, skinnier vessel which made covering the entire cake pop with chocolate much easier. The key here was to make sure the cake pops were frozen onto the stick before dipping them into the hot chocolate, or else the ball would fall off of the stick. After letting the chocolate covered cake pops sit for a minute, I dipped them in blue sprinkles.
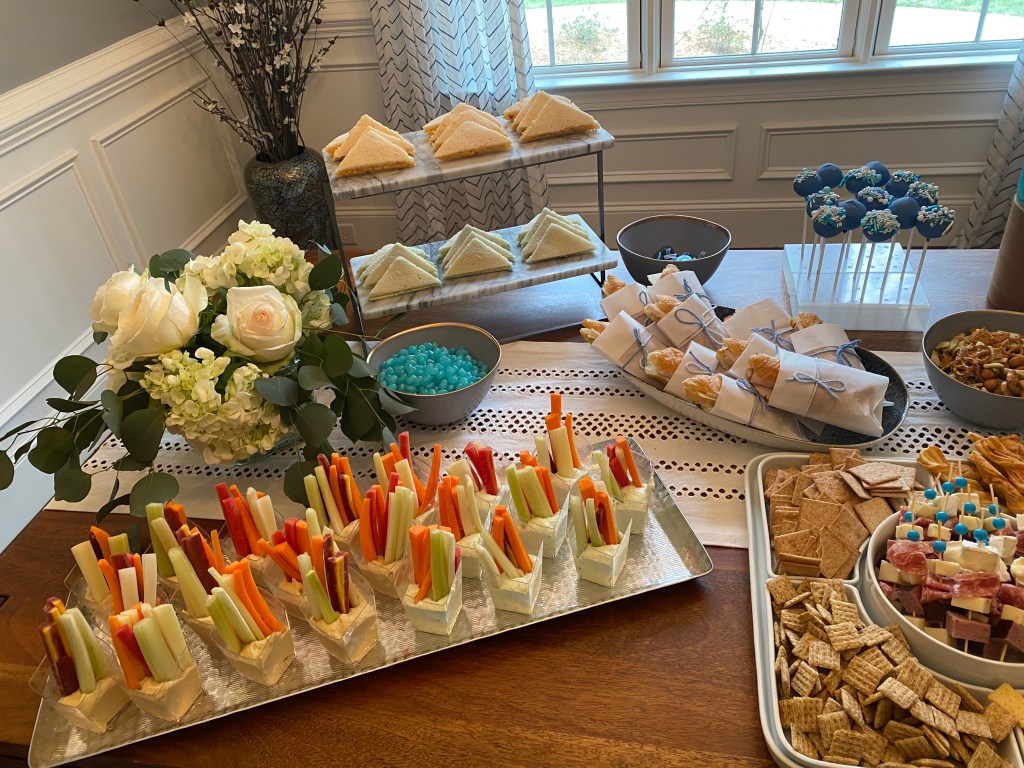
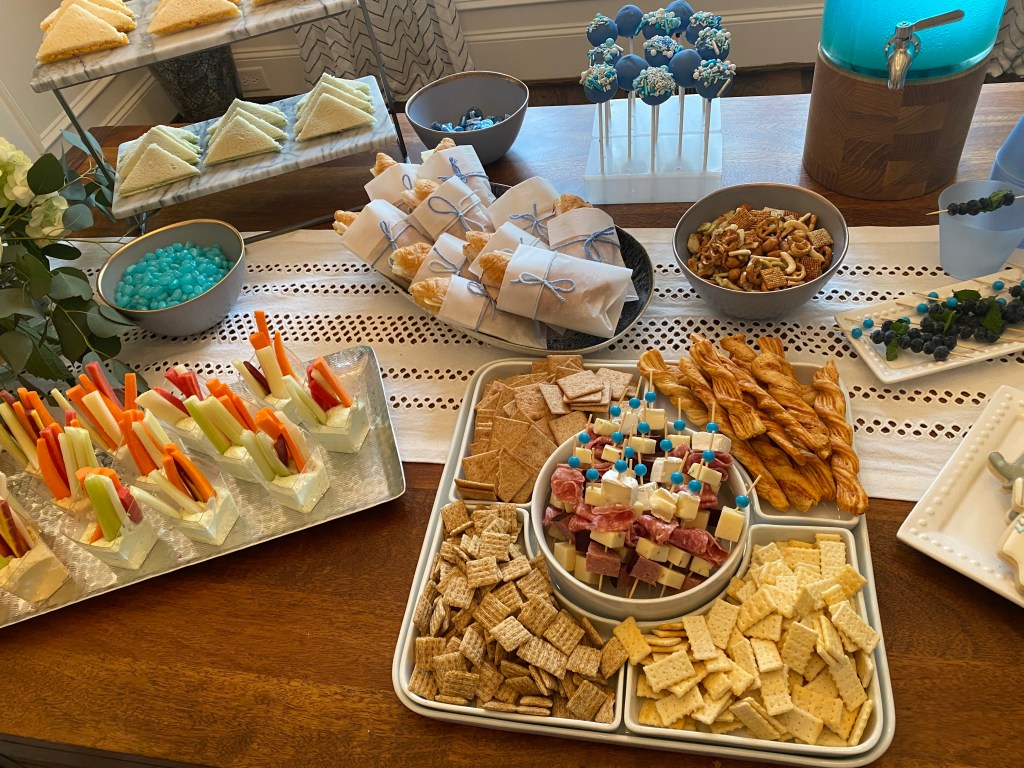
Although the shower was in the afternoon, I wanted to make sure no one went hungry. First, I made a few tea sandwiches using Pepperidge Farm’s thin sliced white bread (which was a key factor in making the sandwiches so dainty). I filled half with pre-made pimento cheese, and the other half with homemade benedictine spread + cucumbers. I also made turkey + cheese croissant sandwiches that I wrapped in wax paper and tied with a blue string – I thought they added an extra decadent flare despite being a super easy food item.
Since we are still in a Pandemic, I figured we shouldn’t have any dips or cheese boards. Instead, I bought these plastic cups from Amazon and filled half with veggies + hummus and the other half with veggies + benedictine spread. I also created some cheeseboard sticks, and layered different meats and cheeses onto toothpicks for easy access.
The Shower
Despite the world being used to zoom meetings and parties, that still doesn’t make them any more interesting or fun. Honestly, no one wants to sit on the computer and watch someone open up a bunch of gifts, even if it is your friend. In order to make it fun, I purchased some “baby bingo” games from Amazon. I sent everyone a bingo card in the mail, and we all brought them out to use while Addy opened presents. It was a fun way to keep everyone engaged, while also having the potential for winning a Starbucks gift card!
For the people who were present at the shower, we played a “water breaking” game. We froze these plastic babies in ice cubes, and placed one in everyone’s drink. The first baby to pop completely out of the ice cube – aka to have their water break – won! It was a fun way to play a game without being too involved, and allowed for us to focus on the mom to be.
At the end of the day, I had an absolute blast. Although it was a lot of work, I think the pictures speak for themselves. We ended up with an aesthetically pleasing setting with yummy food and drinks, and I got to focus on showering one of my best friends as she prepares to become a mom!
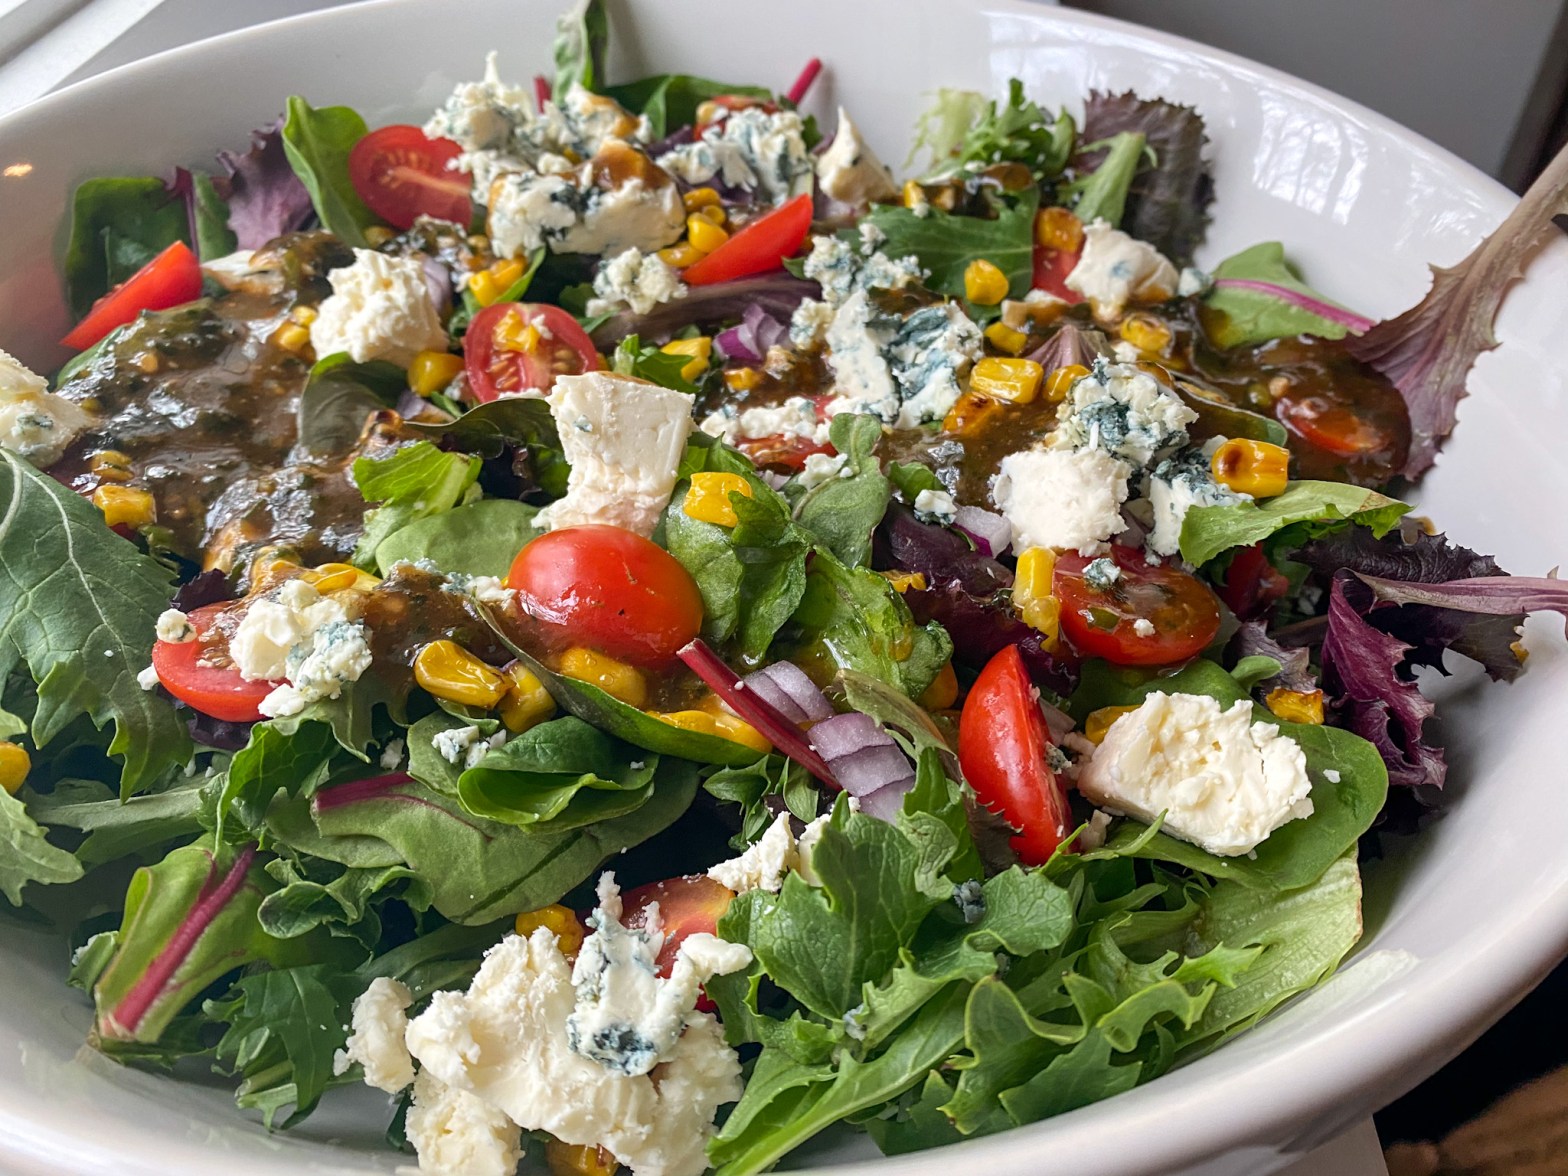
The days are getting warmer here in North Carolina, and that means that one of my favorite seasons is upon us: salad season. Nothing says “summer food” more than a salad. Fruit salad at the beach, pasta salad at a BBQ, and colorful green salads for dinner. Although we just hit Spring, some of our days have already reached 80 degrees. The warmer weather doesn’t lend well to heavy foods, like potatoes or crockpot meals. After a long day at work (and after getting sweaty while walking to my car at the end of the day), I love to come home and eat a big green salad for dinner.
Not only is this salad recipe healthy (which honestly, most of the time, salads are not), but it is incredibly easy and quick to make, too. I use herb “pastes” in place of fresh herbs, simply because I’m lazy. I have made this recipe with chopped fresh herbs, and it tastes just the same.
The nutrition facts below are based off of the entire recipe, however I generally do not use all of the dressing in one sitting.
While I love blue cheese with this recipe, a lot of my friends and family do not. I’ve found that it also goes well with Feta instead. As for protein – I love it paired with steak!
Recipe:
1 c frozen corn
6 c Mixed greens
1/2 pint cherry tomatoes, halved
1/4 c red onion, diced
4 oz blue cheese, crumbled
1/2 c olive oil
1/4 c balsamic vinegar
2 Tbsp basil paste
2 Tbsp parsley paste
1 tsp garlic, minced
1/2 tsp Dijon mustard
Place about 2 Tbsp of oil in a skillet. Once heated, add frozen corn. Sauté until corn is blackened
Place the mixed greens, cherry tomatoes, red onion, blue cheese, and sautéed corn in a bowl.
Mix the remaining ingredients together (oil, balsamic vinegar, basil, parsley, garlic, and Dijon). Pour desired amount of dressing over salad.
Serve fresh. Makes 6 servings
Nutrition Facts per serving: 220 calories / 7 g protein / 10 g carbs / 228 mg sodium
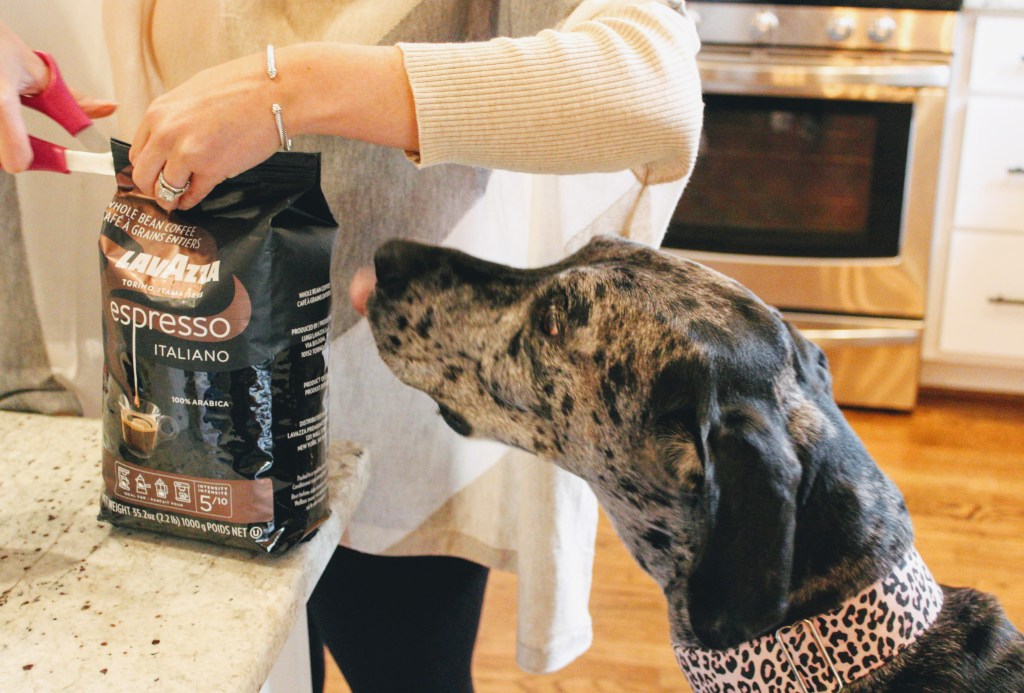
Espresso martinis are the perfect pick-me-up after a long day at work. I first perfected this recipe after I was working on a Saturday and needed to perk up before hosting friends that night. I had only ever tried “milky” espresso martinis, and those never sat too well with me. This recipe uses Kahlua instead of Baileys or another milky/sweet liqueur. It gives it the perfect amount of sweetness without overpowering the espresso flavor.
We have a coffee machine that makes espresso, but if you don’t have one, you can also use these Starbucks espresso cansas well.
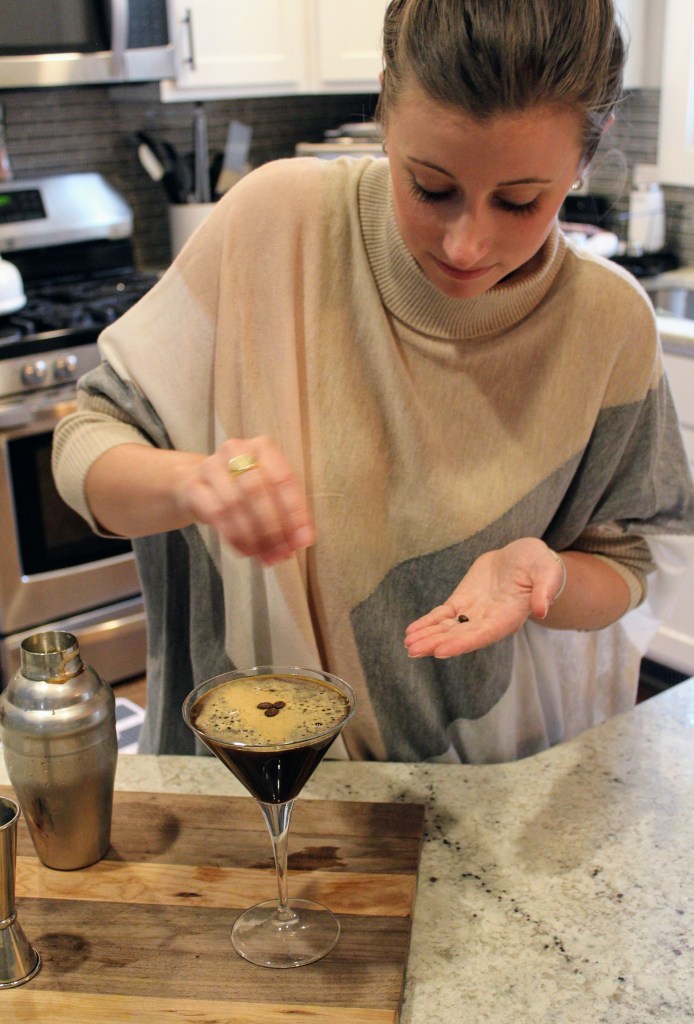
There are also multiple variations of toppings you can try. I usually just do sifted coffee grounds on top, but we had some whole espresso beans that we used while shooting the pictures for this post. You could also use a dash of cinnamon.
Recipe:
2 oz espresso
2 oz vodka
2 oz Kahlua
Pour all the ingredients over ice and shake well. That’s it! It works best if you can let the espresso cool off before using it, however I have made these plenty of times with hot espresso right out of the machine and it tastes fine and doesn’t become too watered down.
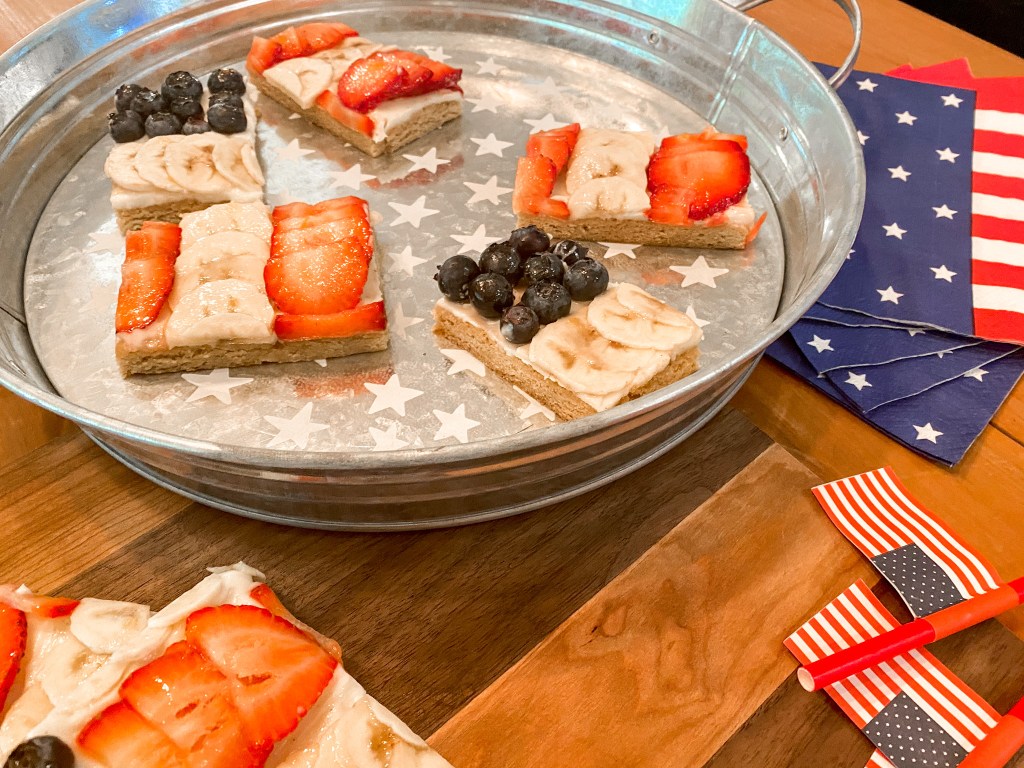
Summer is here, and that means it’s time to prepare for all the summer holidays! Will and I love to celebrate America, and I also love any excuse to break out a baking pan and make a delicious treat. While we will be traveling this Memorial Day celebrating our good friend’s wedding, here is a festive cookie bar recipe I came up with.
The best thing about a “fruit pizza” or cookie bar is that their center always comes out soft, unlike regular cookies. This cookie bar is no exception. The soft cookie layer is covered with a sweet cream cheese frosting. And to top it all off, a layer of fruit to create a fresh summer dessert. I used blueberries, strawberries, and bananas to create an American Flag decoration, but you could use any type of fruit you like if you aren’t making this for a holiday theme.
For the Cookie
1 cup (2 sticks) butter, softened
3/4 cup sugar
3/4 cup brown sugar
1 tsp vanilla extract (don’t forget about my homemade vanilla extract recipe!)
2 eggs
2 1/4 cup flour
1 tsp baking soda
1/2 tsp salt
For the Frosting:
8 oz cream cheese, softened
2/3 cup powdered sugar
1/2 tsp vanilla extract
For the Fruit Topping:
3 cups strawberries, sliced thin
2 bananas, sliced thin
1 cup blueberries
2 Tbsp apricot preserves
2 Tbsp water
Instructions:
Make the cookie layer. Beat together the butter, sugar, and brown sugar until smooth. Add the eggs. Once mixed together add in all the dry ingredients. Spread over a greased baking sheet and bake at 350 degrees until golden brown, about 12 minutes. Let cool completely before frosting.
For the frosting; beat together the cream cheese, powdered sugar, and vanilla. Spread evenly over the cookie cake.
For the final step, use the fresh fruit to decorate the cake. The quantities listed can create an American flag, but you could use any other variety of fruit if you aren’t making this for Memorial Day (or Fourth of July or Labor Day, for that matter!)
Once the fruit is arranged on top, heat the 2 Tbsp of apricot preserves in the microwave and mix with the 2 Tbsp water. Use a pastry brush or basting brush to spread evenly over the fruit. This will help preserve the fruit and maintain the color of the bananas.
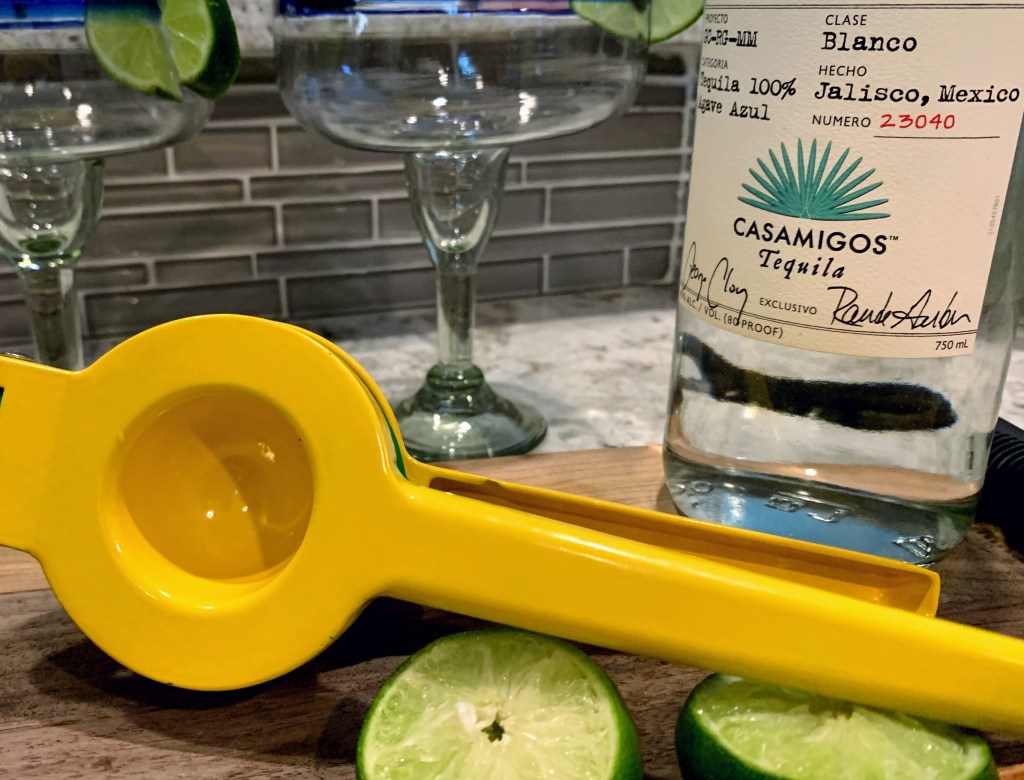
With Cinco De Mayo coming up, I’ve got Mexican on my mind. Tacos, nachos, tequila. Especially tequila. I love a good margarita, but hate sugary drinks. The headache is just not worth it to me!
I played around with this recipe a few times – even making a frozen version. I forced my husband and friends to try all the variations (of course, they really didn’t mind). When I finally came to this concoction, it was like a lightbulb went off. It’s perfect!
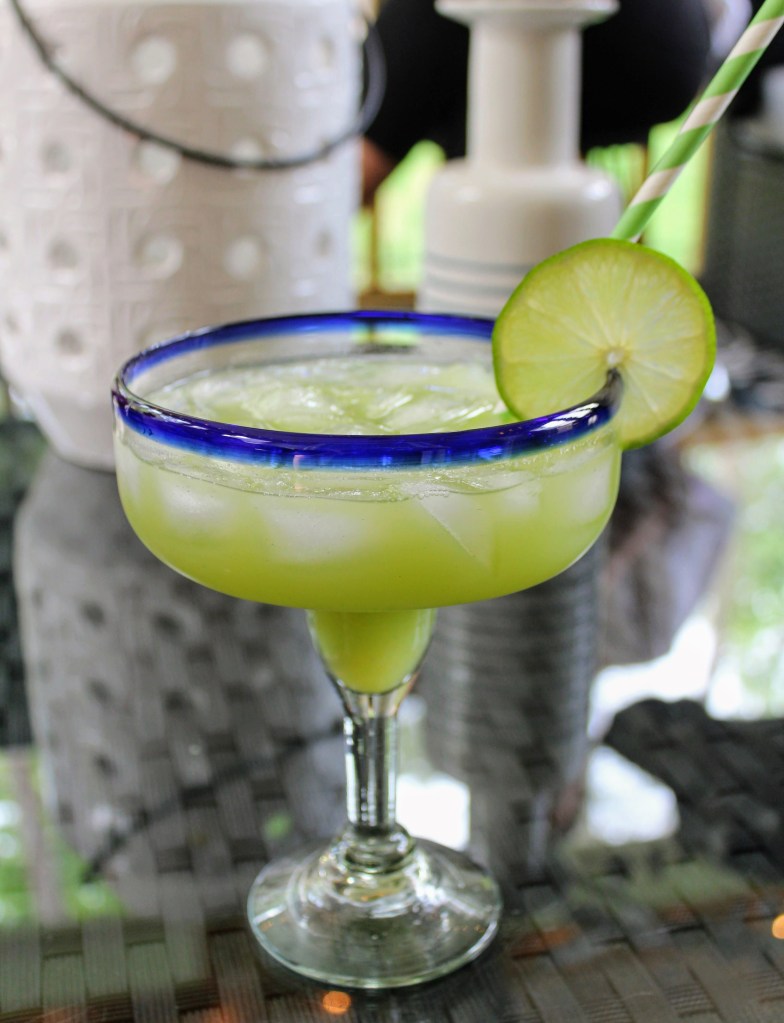
I swapped the sugar and orange liqueur that you often see in margaritas for fresh orange juice. And to add an extra fresh aspect to the drink, I used cucumber juice. While this recipe takes a bit longer than a typical margarita to make, I promise the end result will be worth it! Hope you enjoy!
Ingredients:
2 oz silver tequila
2 oz cucumber juice (see below for directions on how to make – 1 seedless (English) cucumber usually makes ~4 oz)
3 Tbsp lime juice
3 Tbsp fresh orange juice
Ice
To make the cucumber juice: I have found that 1 seedless (English) cucumber will make enough juice for about 2 drinks (total 4 oz). Peel the cucumber, then slice into chunks. Blend the pieces until they create a “paste”. If you have a good blender you can use that. My ninja blender didn’t work, so I used my food processor instead and it worked perfect. Finally, strain the cucumber “paste” out, either by using a mesh sieve or cheesecloth, to create the juice.
Directions to make: Fill a cup with ice. Add in all 4 ingredients, and mix together with a straw or spoon. Enjoy!
Conversions for multiplying the recipe: There are 2 Tbsp in an ounce, and 2 oz is equal to a 1/4 cup
Living in North Carolina, we have a long stretch of the year in which we can be outdoors. We have two porches at our house; one long porch in the front and a screened porch in our backyard. We love to spend as much time as possible in both of these areas, and once the pollen leaves every spring I do a deep clean, update the plants, and refresh the pillows and cushions.
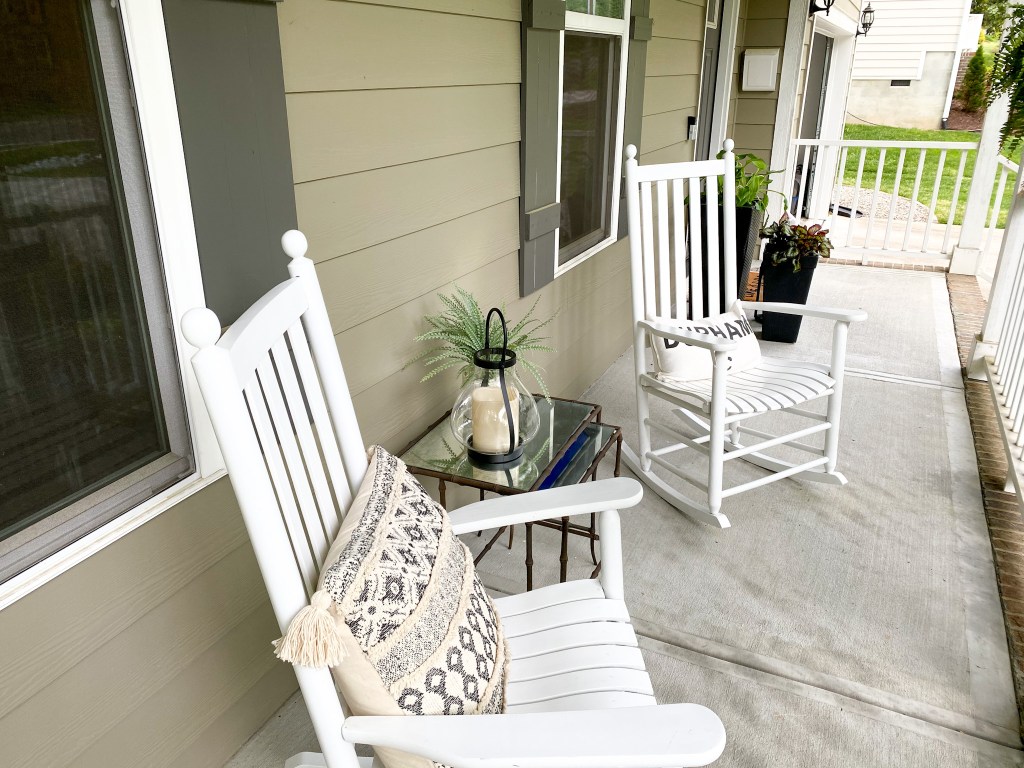
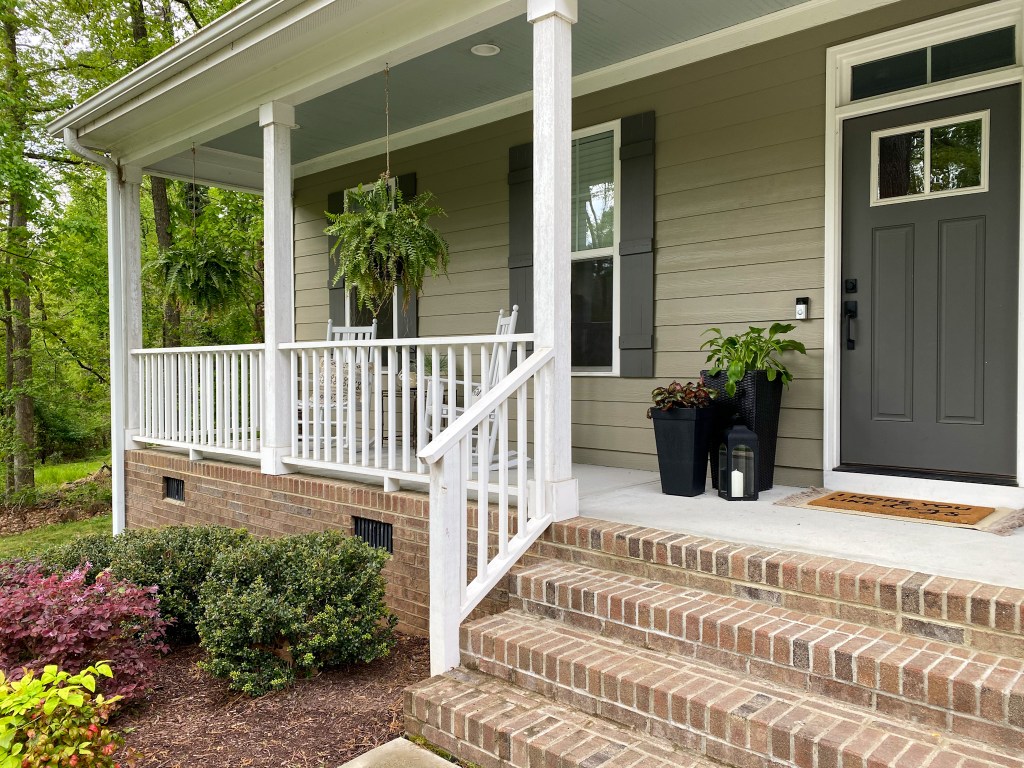
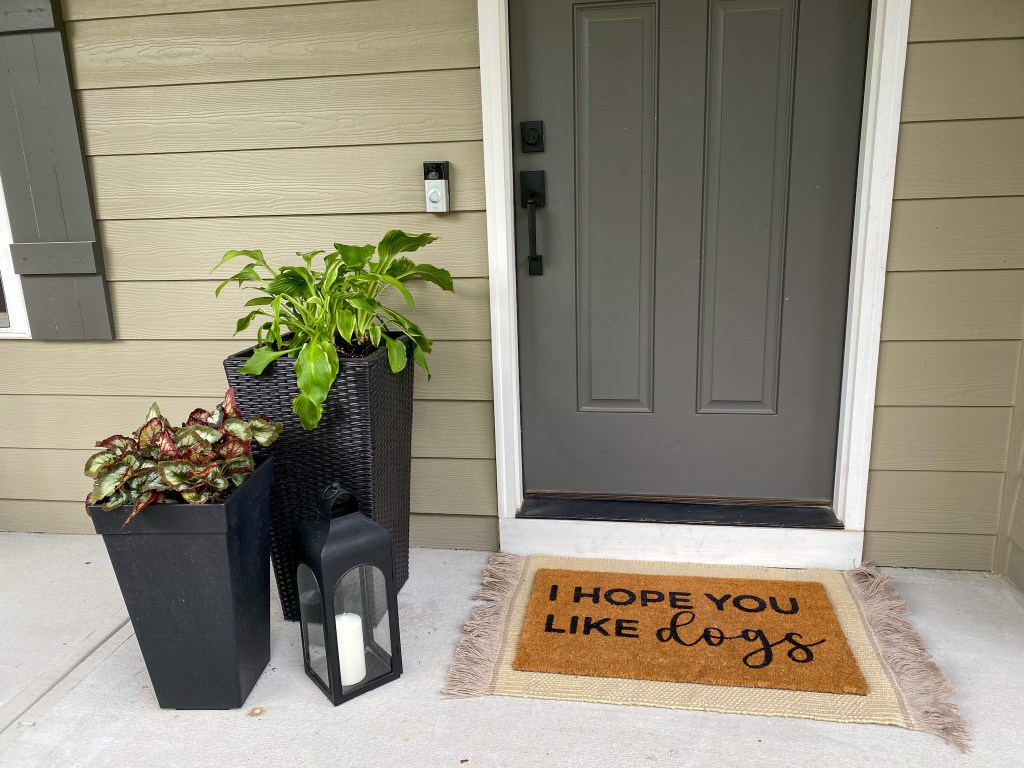
We live on a busy road, and we love to sit on the front porch in the evenings to have a cocktail, and watch the cars go by. I wanted to make our front porch not only comfortable and inviting to sit on, but I also wanted to make it aesthetic as it is the first thing people see when they come to our house. There are also hundreds of people who drive by every day, so of course I wanted to make it look good.
I started with two white rocking chairs that we bought from a local furniture store. I have seen plenty of cheaper outdoor rocking chairs at Lowe’s and Home Depot, but since we leave these out all year long I wanted to make sure they were durable and would last. Then we added a table we already had with some durable decor on top.
We are coming into Spring/Summer and I wanted to make sure we had plenty of greenery. We (okay, Will did all the work) placed two hanging plants, and then I purchased these two planters from Homegoods and Target.
Last is our welcome mat. I am a sucker for a good welcome mat, and I like to switch them up for the holidays. Of course I had to incorporate dogs – I found this one on Etsy. I also love to layer them to add some extra dimension. In the colder months I like to use a black and white checkered rug, but I think this neutral one is perfect for the spring/summer months.
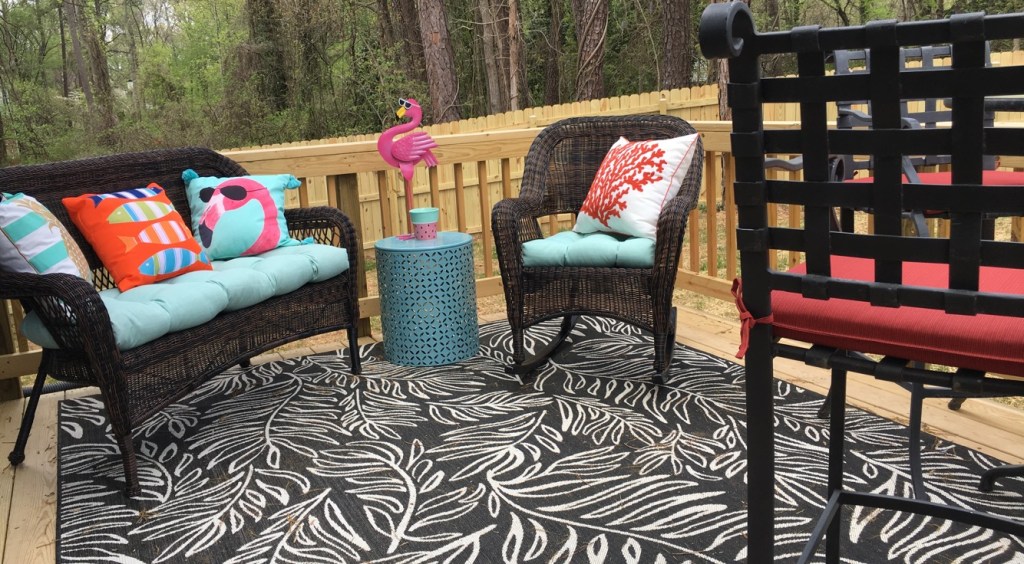
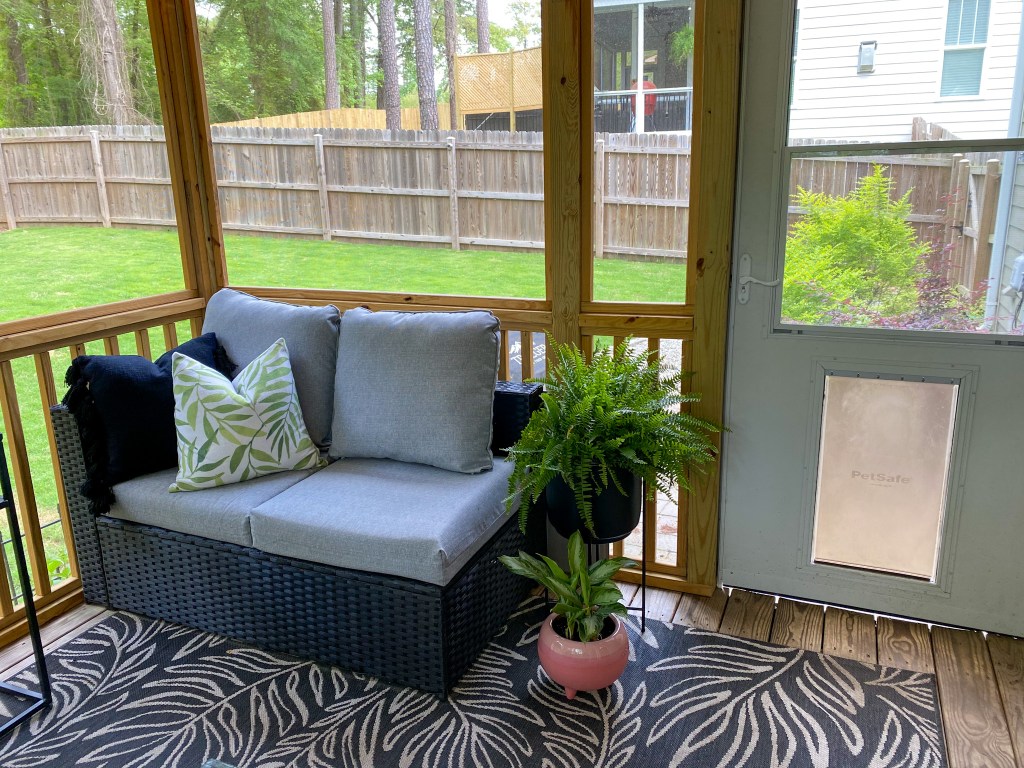
Our house came with a back porch, and we loved it at first. However, we decided to change it into a screened porch and make it a cozier, more livable space. Here is what it looked like prior to screening it in:
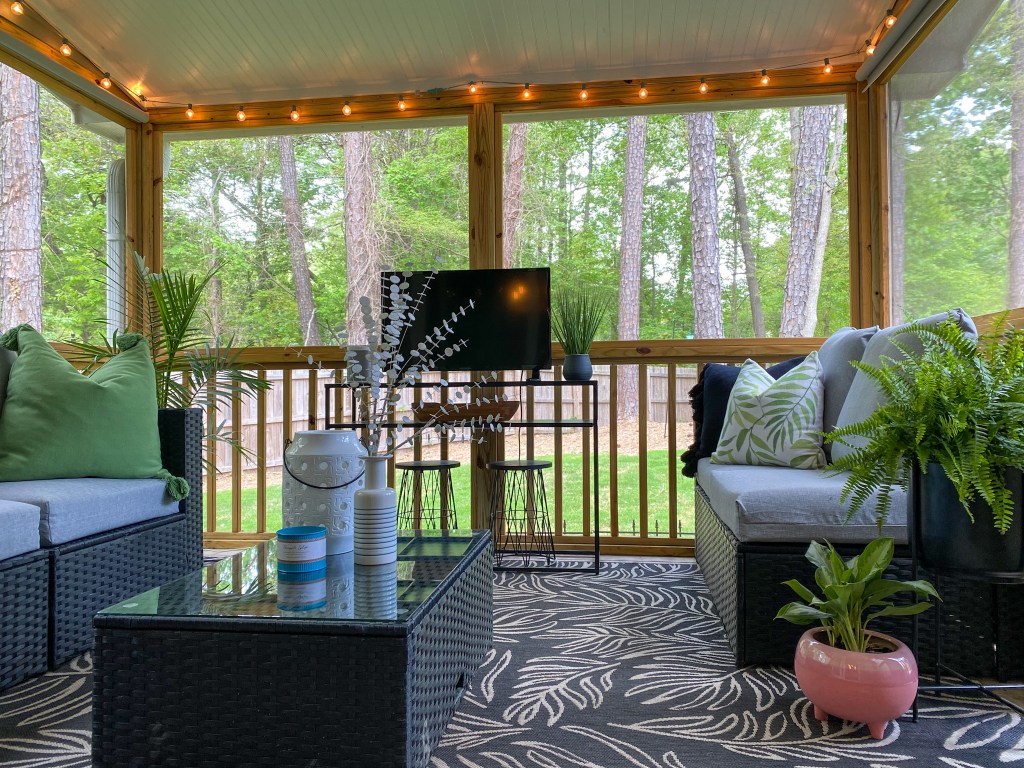
We found our outdoor couch on Wayfair. We originally had it as a corner couch, but we ended up finding that it wasn’t a great set up for hosting friends so we took it apart and formed these two separate couches. We also have these two stools that we store under the TV stand. We used to use them as plant stands, but we now use them as extra seating for when we have people over, and they work great for a short gathering. The couch came with a matching coffee table that I eventually want to switch out, but it works for now.
Continuing with our greenery, we love to keep plants out here as well (of course, Will makes sure they are watered and I don’t actually touch them). Alice LOVES to come out here and stand in the palm fern. We looked up if that was normal or not, and apparently it is. It’s called “trancing” – when a dog goes and stands in a corner for no apparent reason.
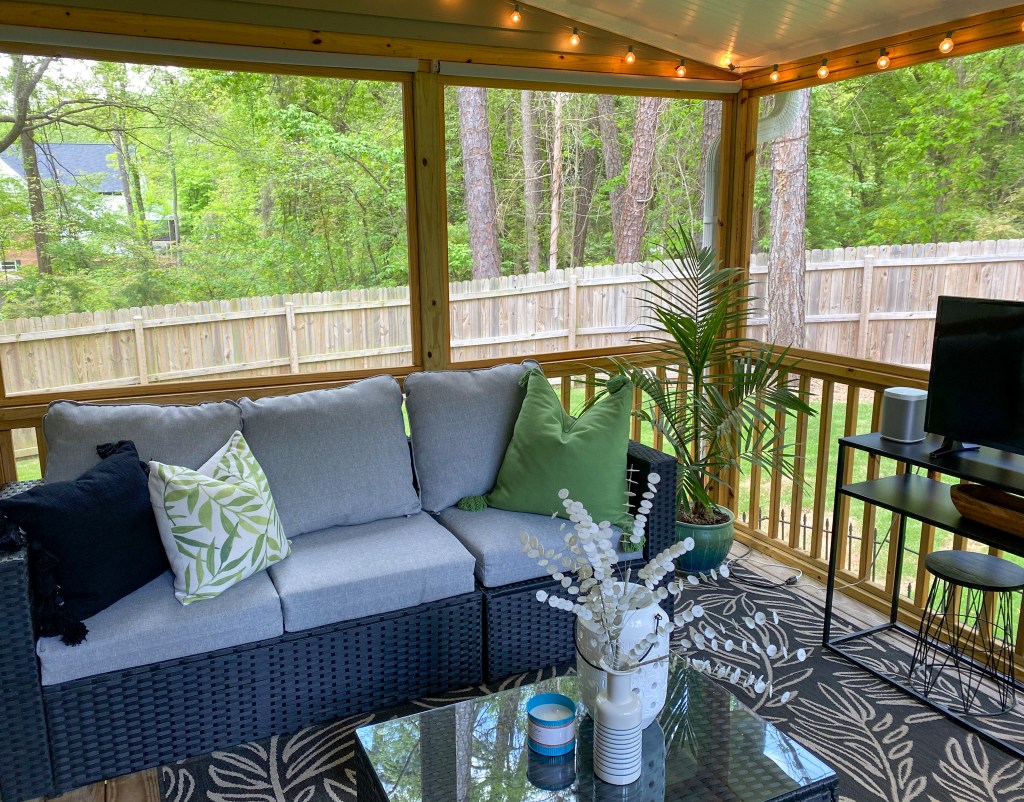
We added some shades to help block the sun when we are watching TV in the afternoons, and we added these string lights to help create a perfect ambiance.
We considered painting the wood back here – I probably would have chosen a shade of white. However, painted wood tends to splinter faster and requires frequent upkeep (like our front porch), so we opted to keep the natural wood look instead.
We’ve had this outdoor rug for years. It has held up great, and it covers the dirt and mud that the dogs drag through.
Lastly, if you are a dog owner I cannot stress enough how great a screened in porch is. We have a dog door that leads into our yard (it’s shockingly big enough to fit our Great Dane, Alice, too). When it is raining, or the yard is muddy, we are able to lay a ton of drop cloths down out here which catches a majority of the mud from their paws before they come into our house. It also allows us to wipe down the dogs outside before them come in. A win-win in my book!
And there you have it. I hope this post gave you some good inspiration for updating and decorating your own outdoor space!
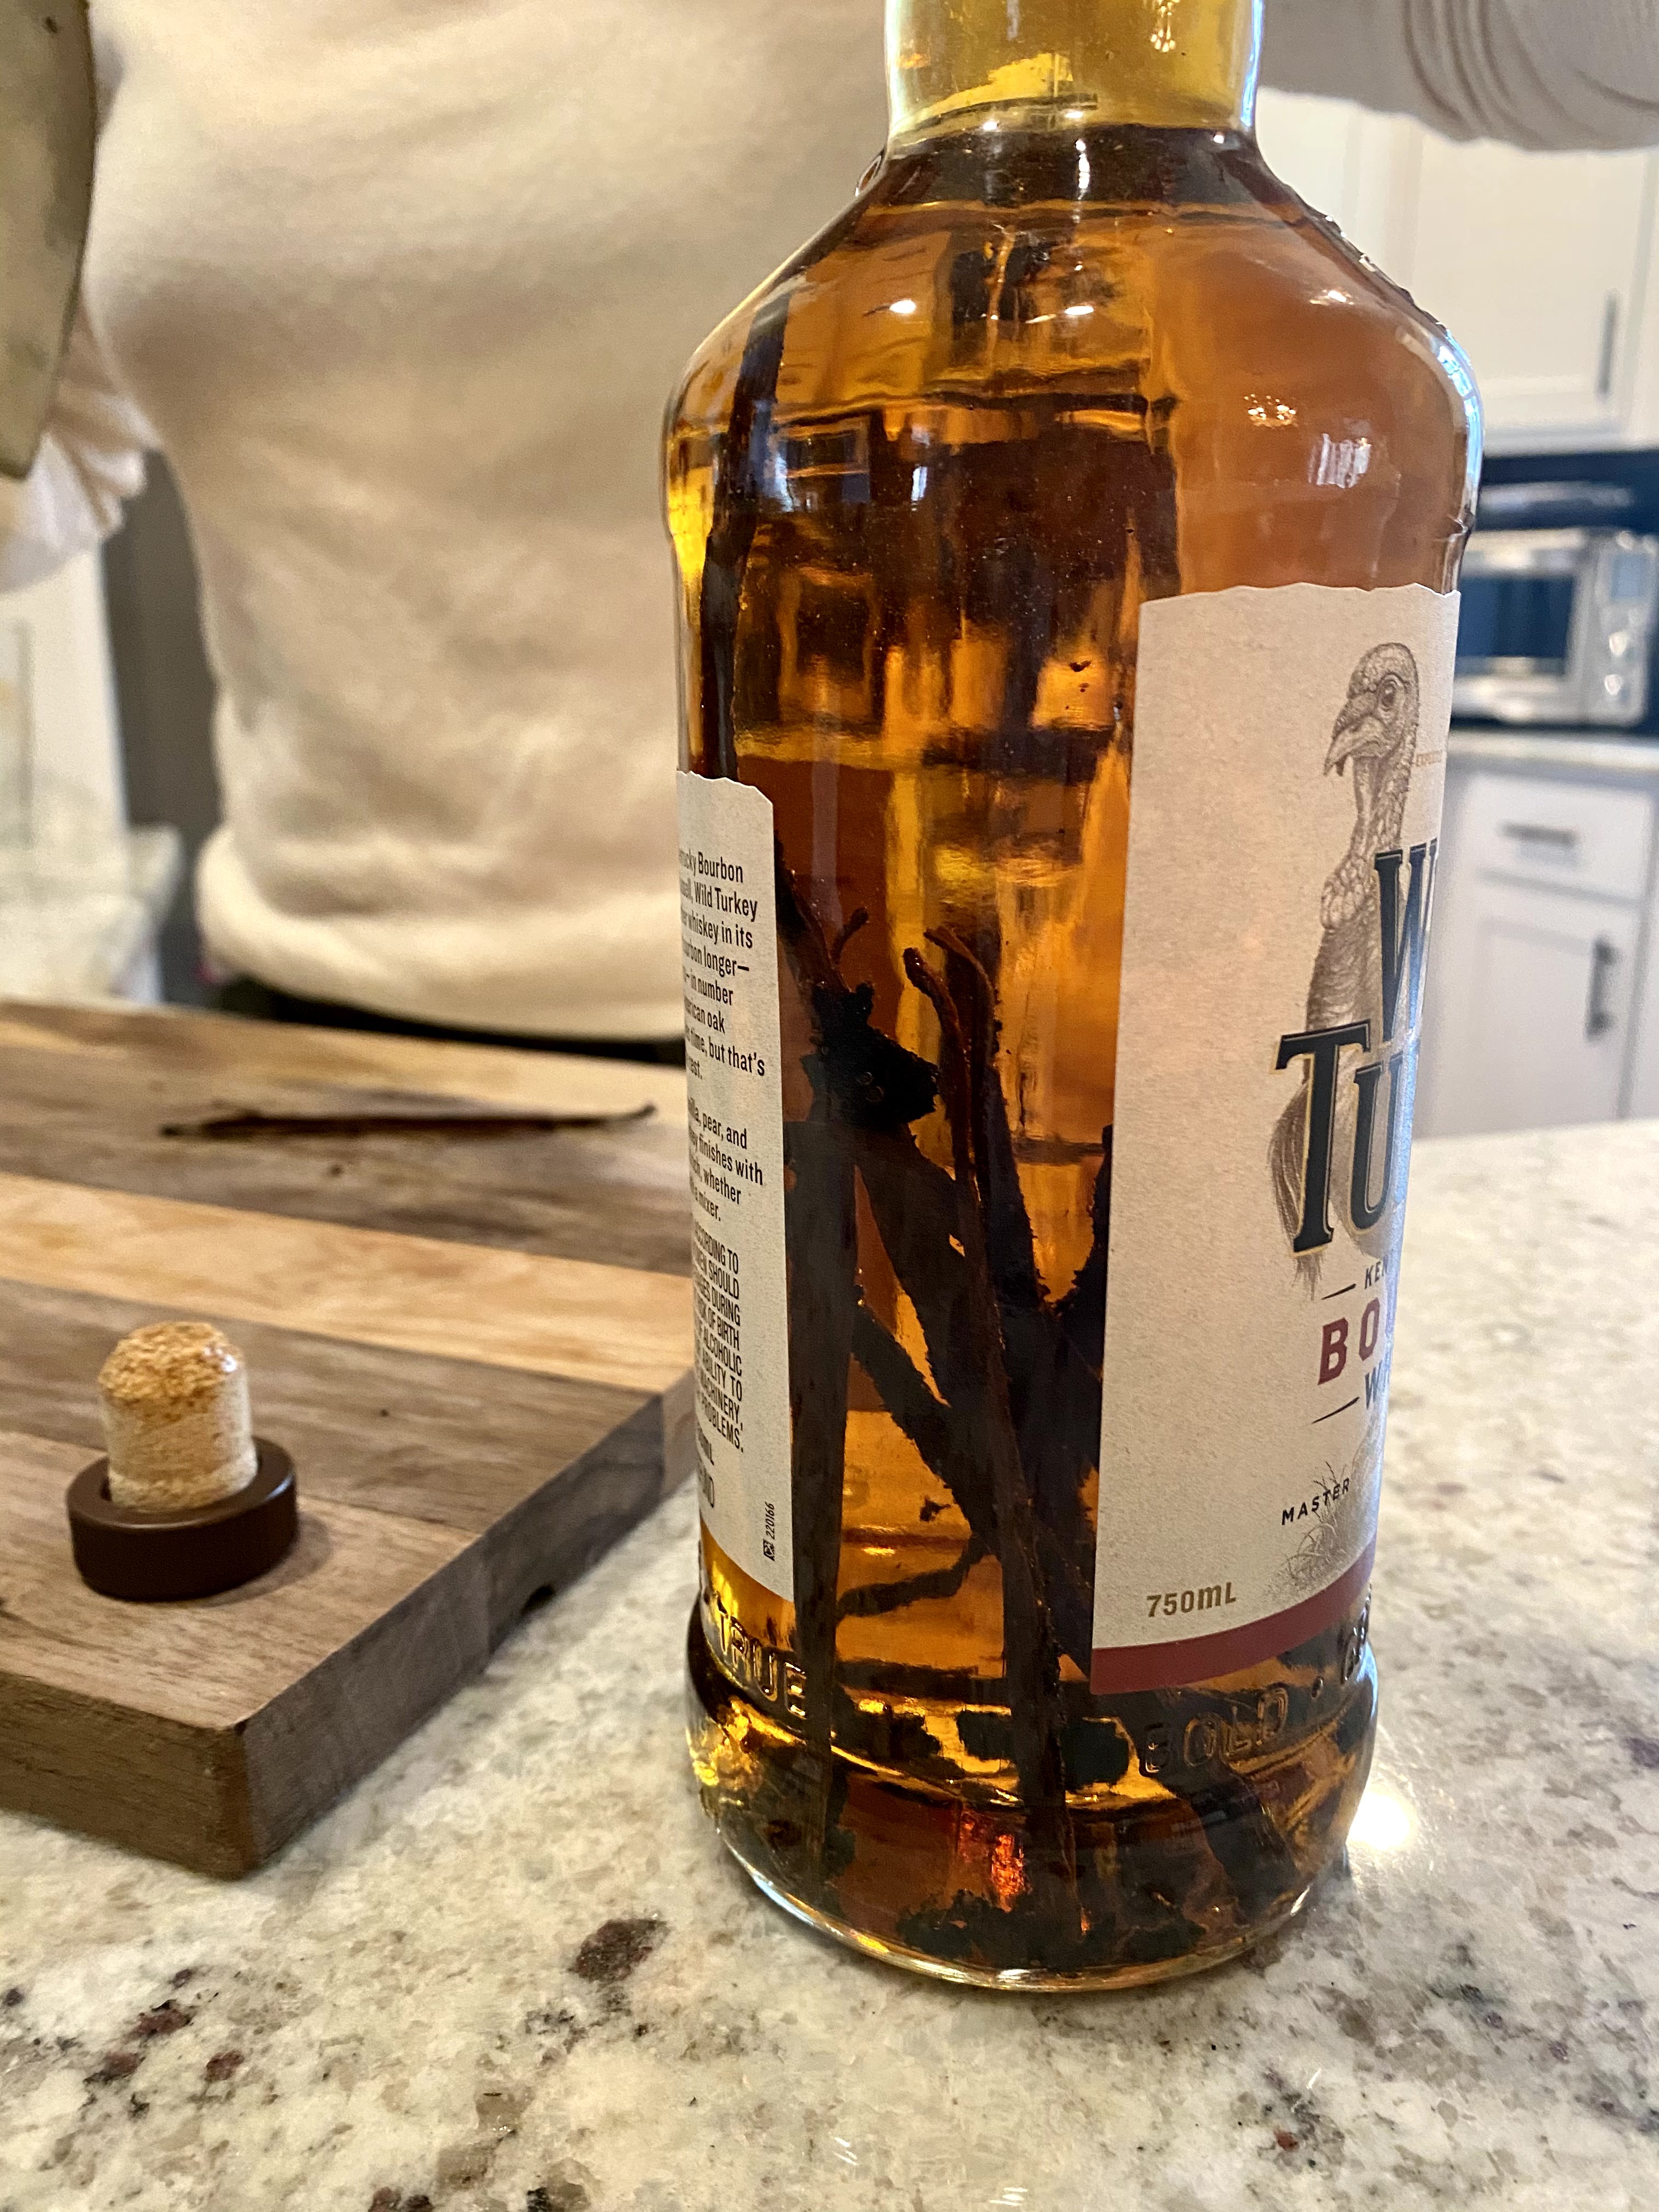
Growing up, my Mom was known for her baking. Every school event, birthday party, and sport outing would include homemade baked goods from her. She would always brush it off when people would swoon over how good they were – but she had a secret ingredient: Homemade vanilla bean flavoring.
The recipe is easy:
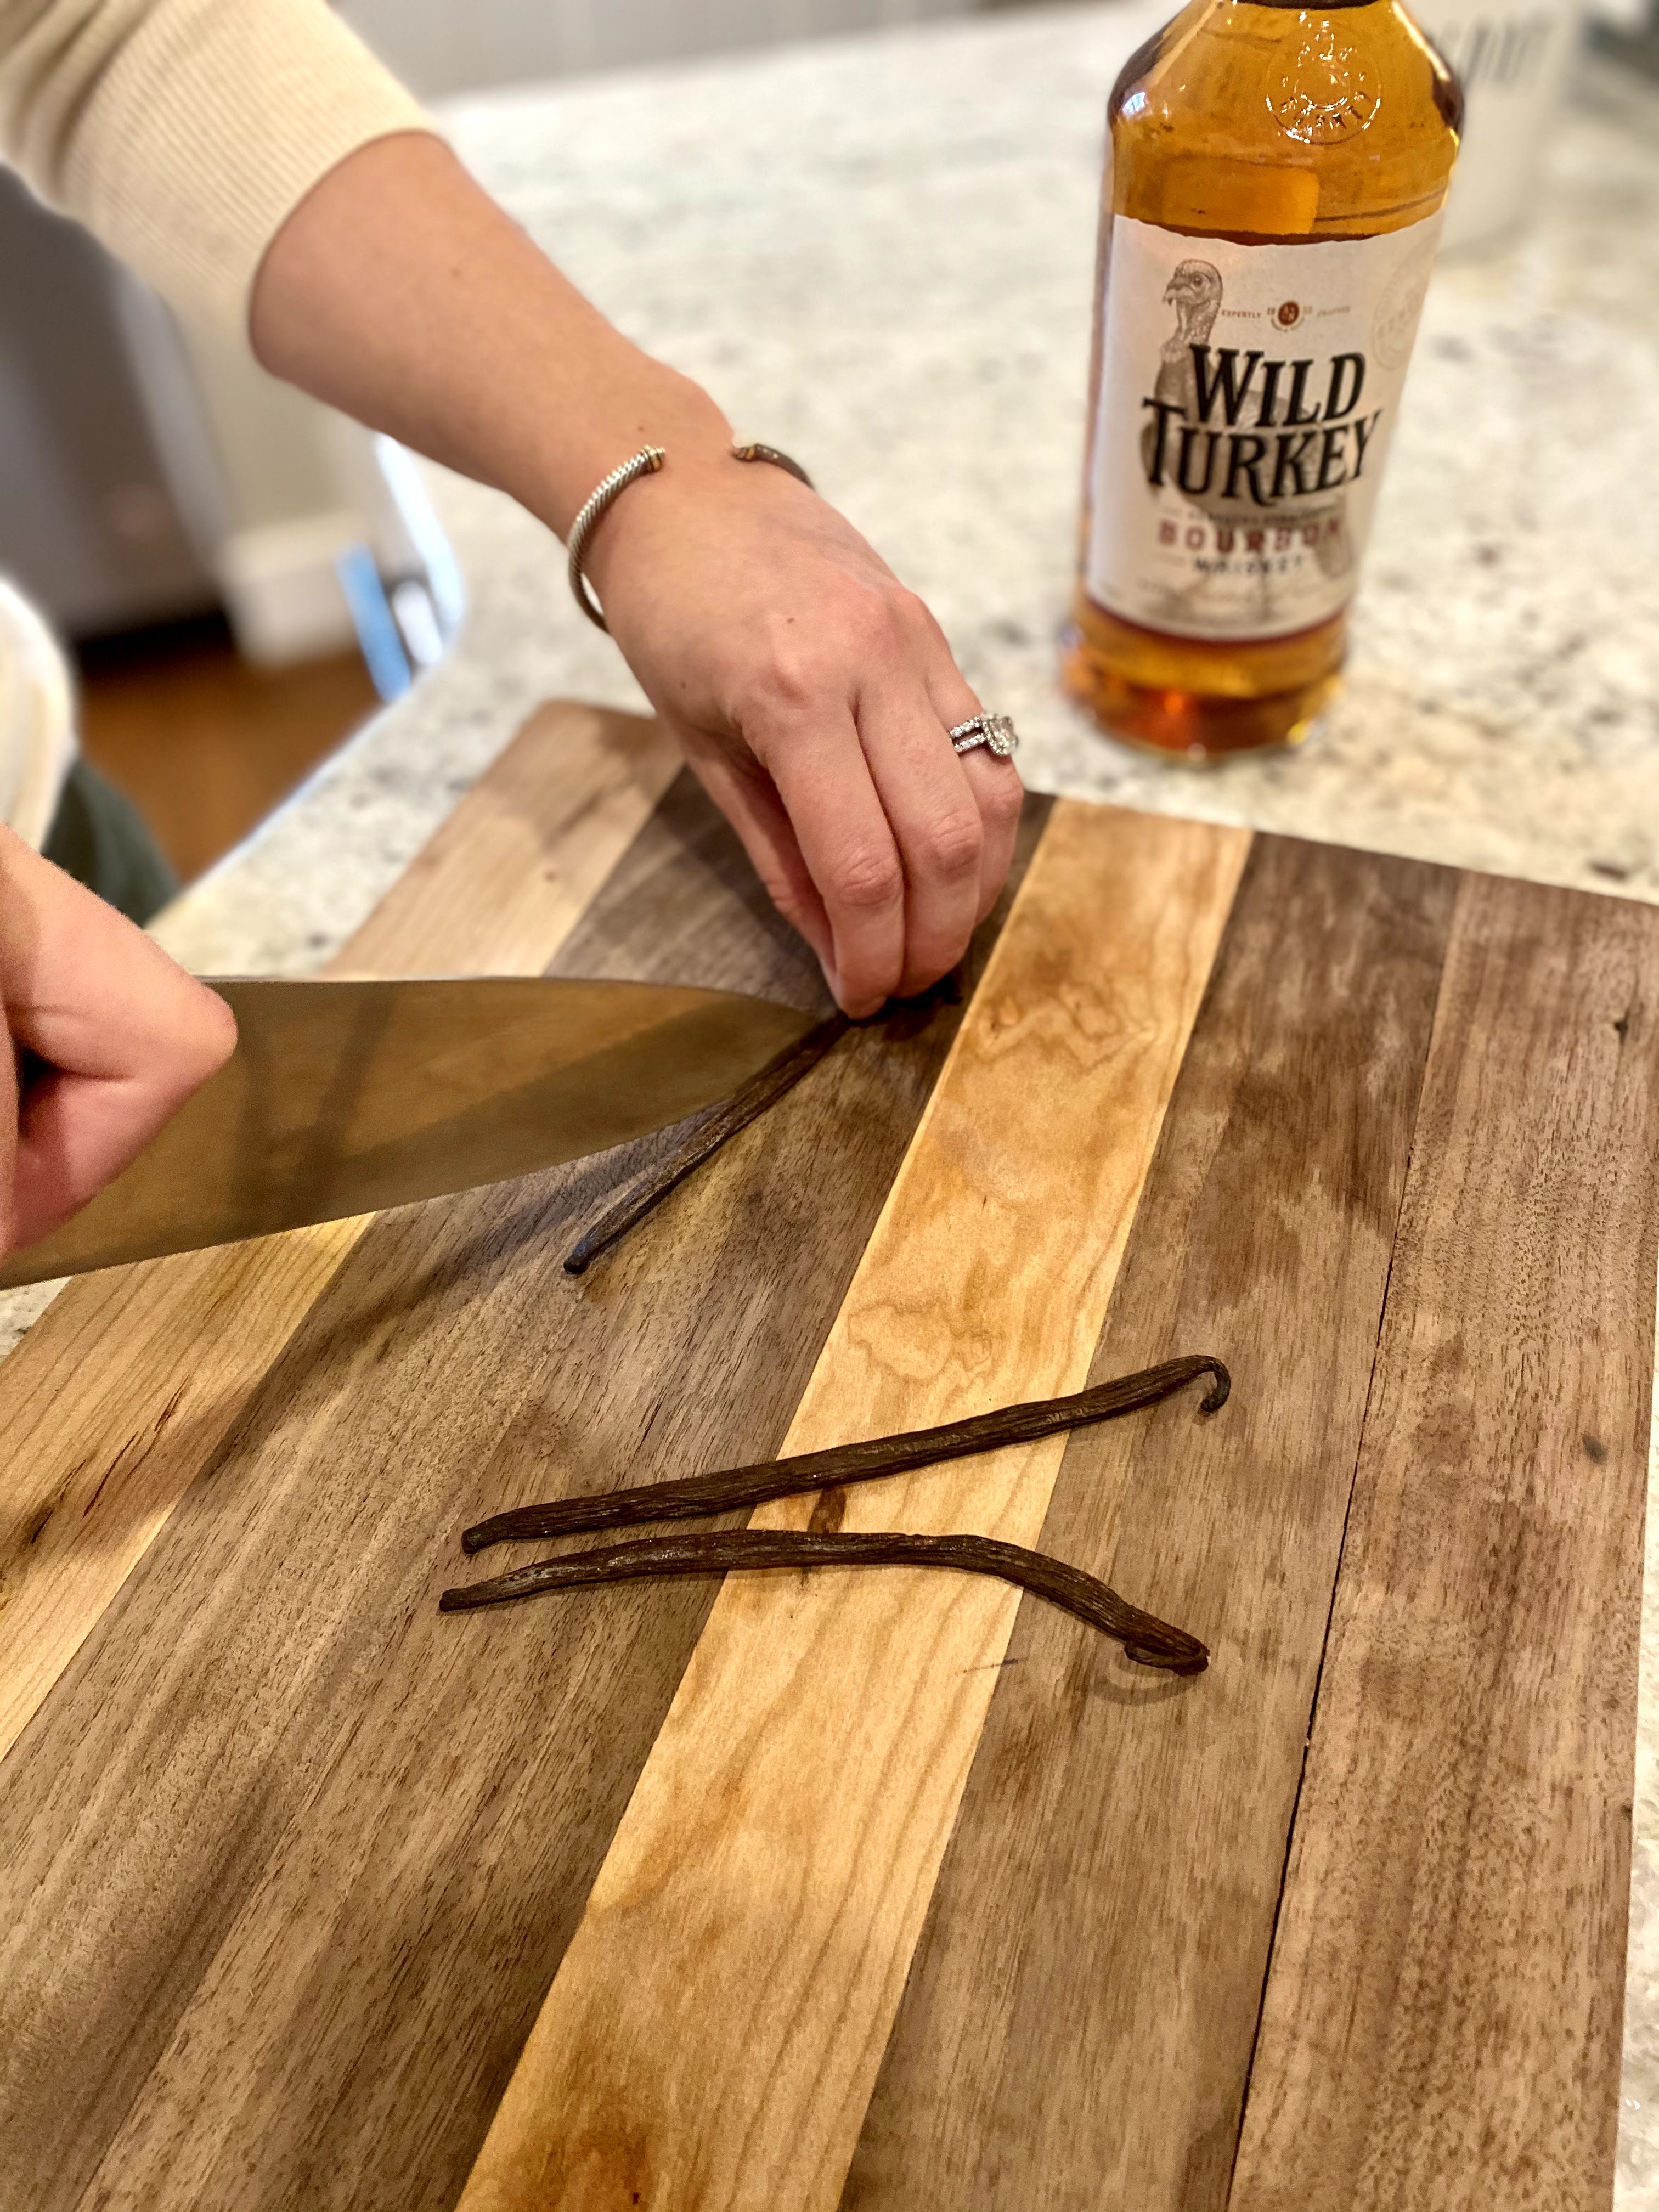
1 750 mL bottle bourbon (mom always used Wild Turkey – so I am partial to it)
3 whole vanilla beans (I got some off of Amazon, but this is definitely something you should splurge on if you can find them at your local specialty grocery store. If you have extra, they freeze well).
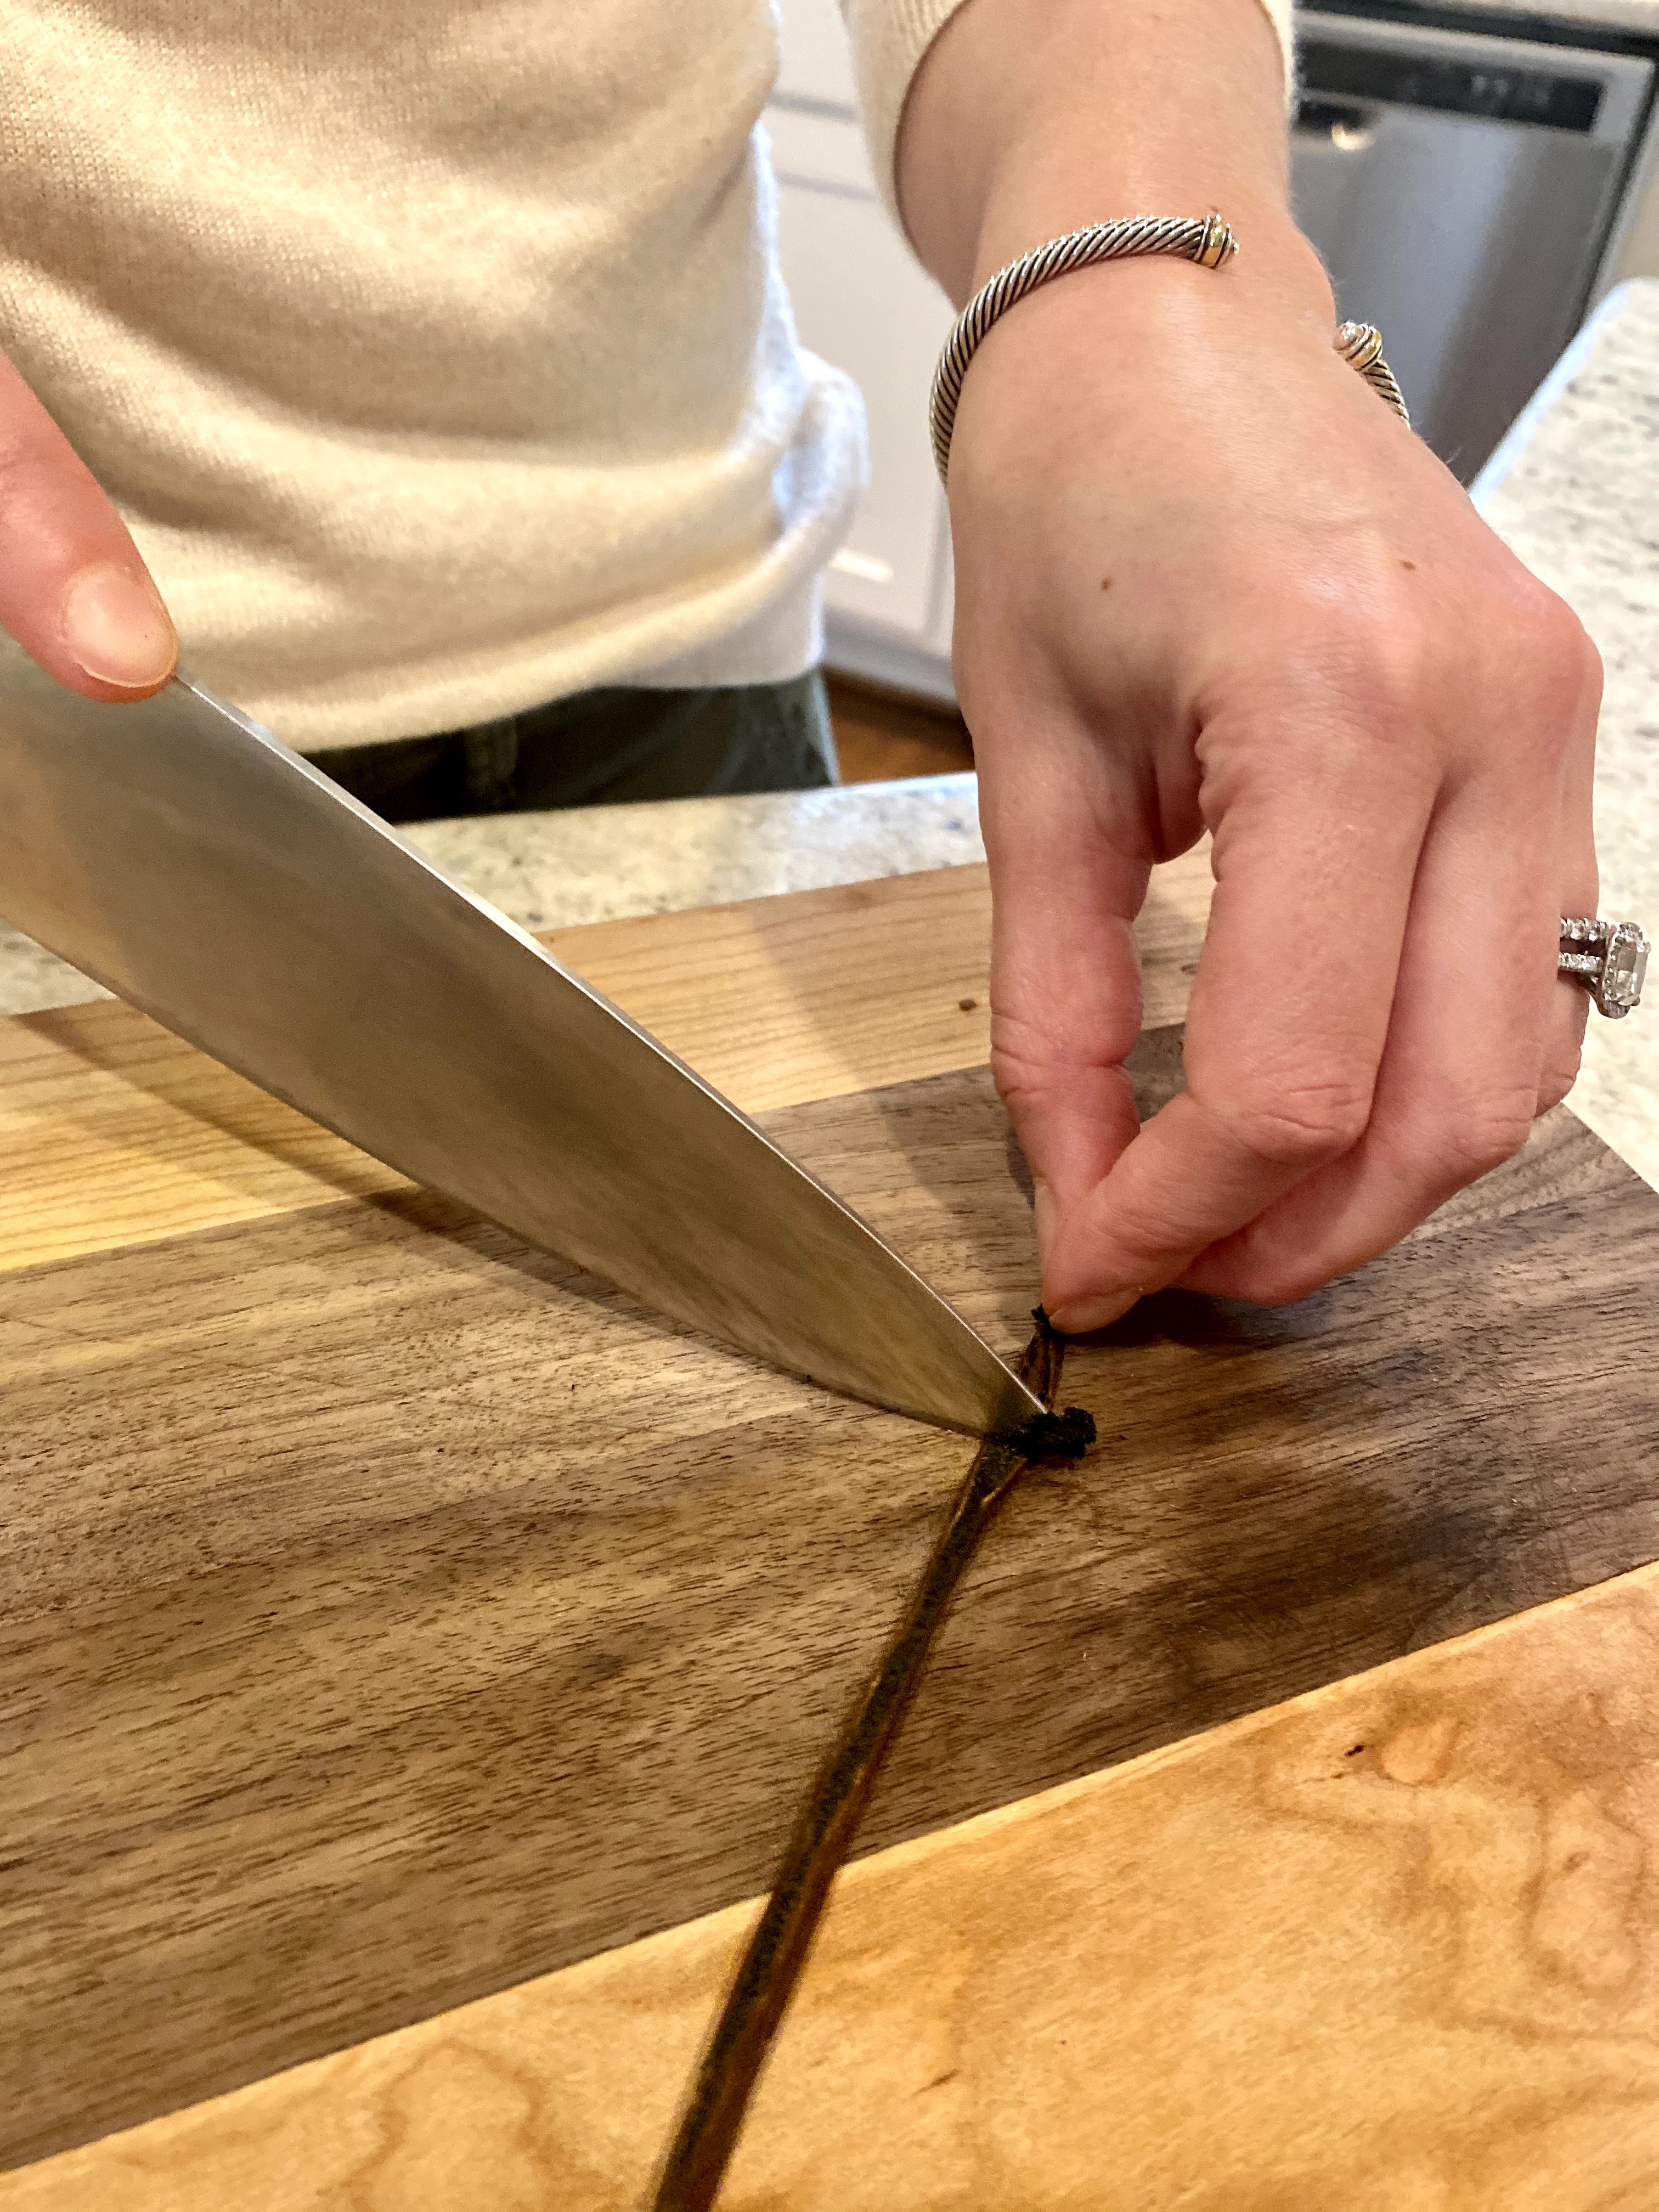
Start by slicing the vanilla beans in half lengthwise
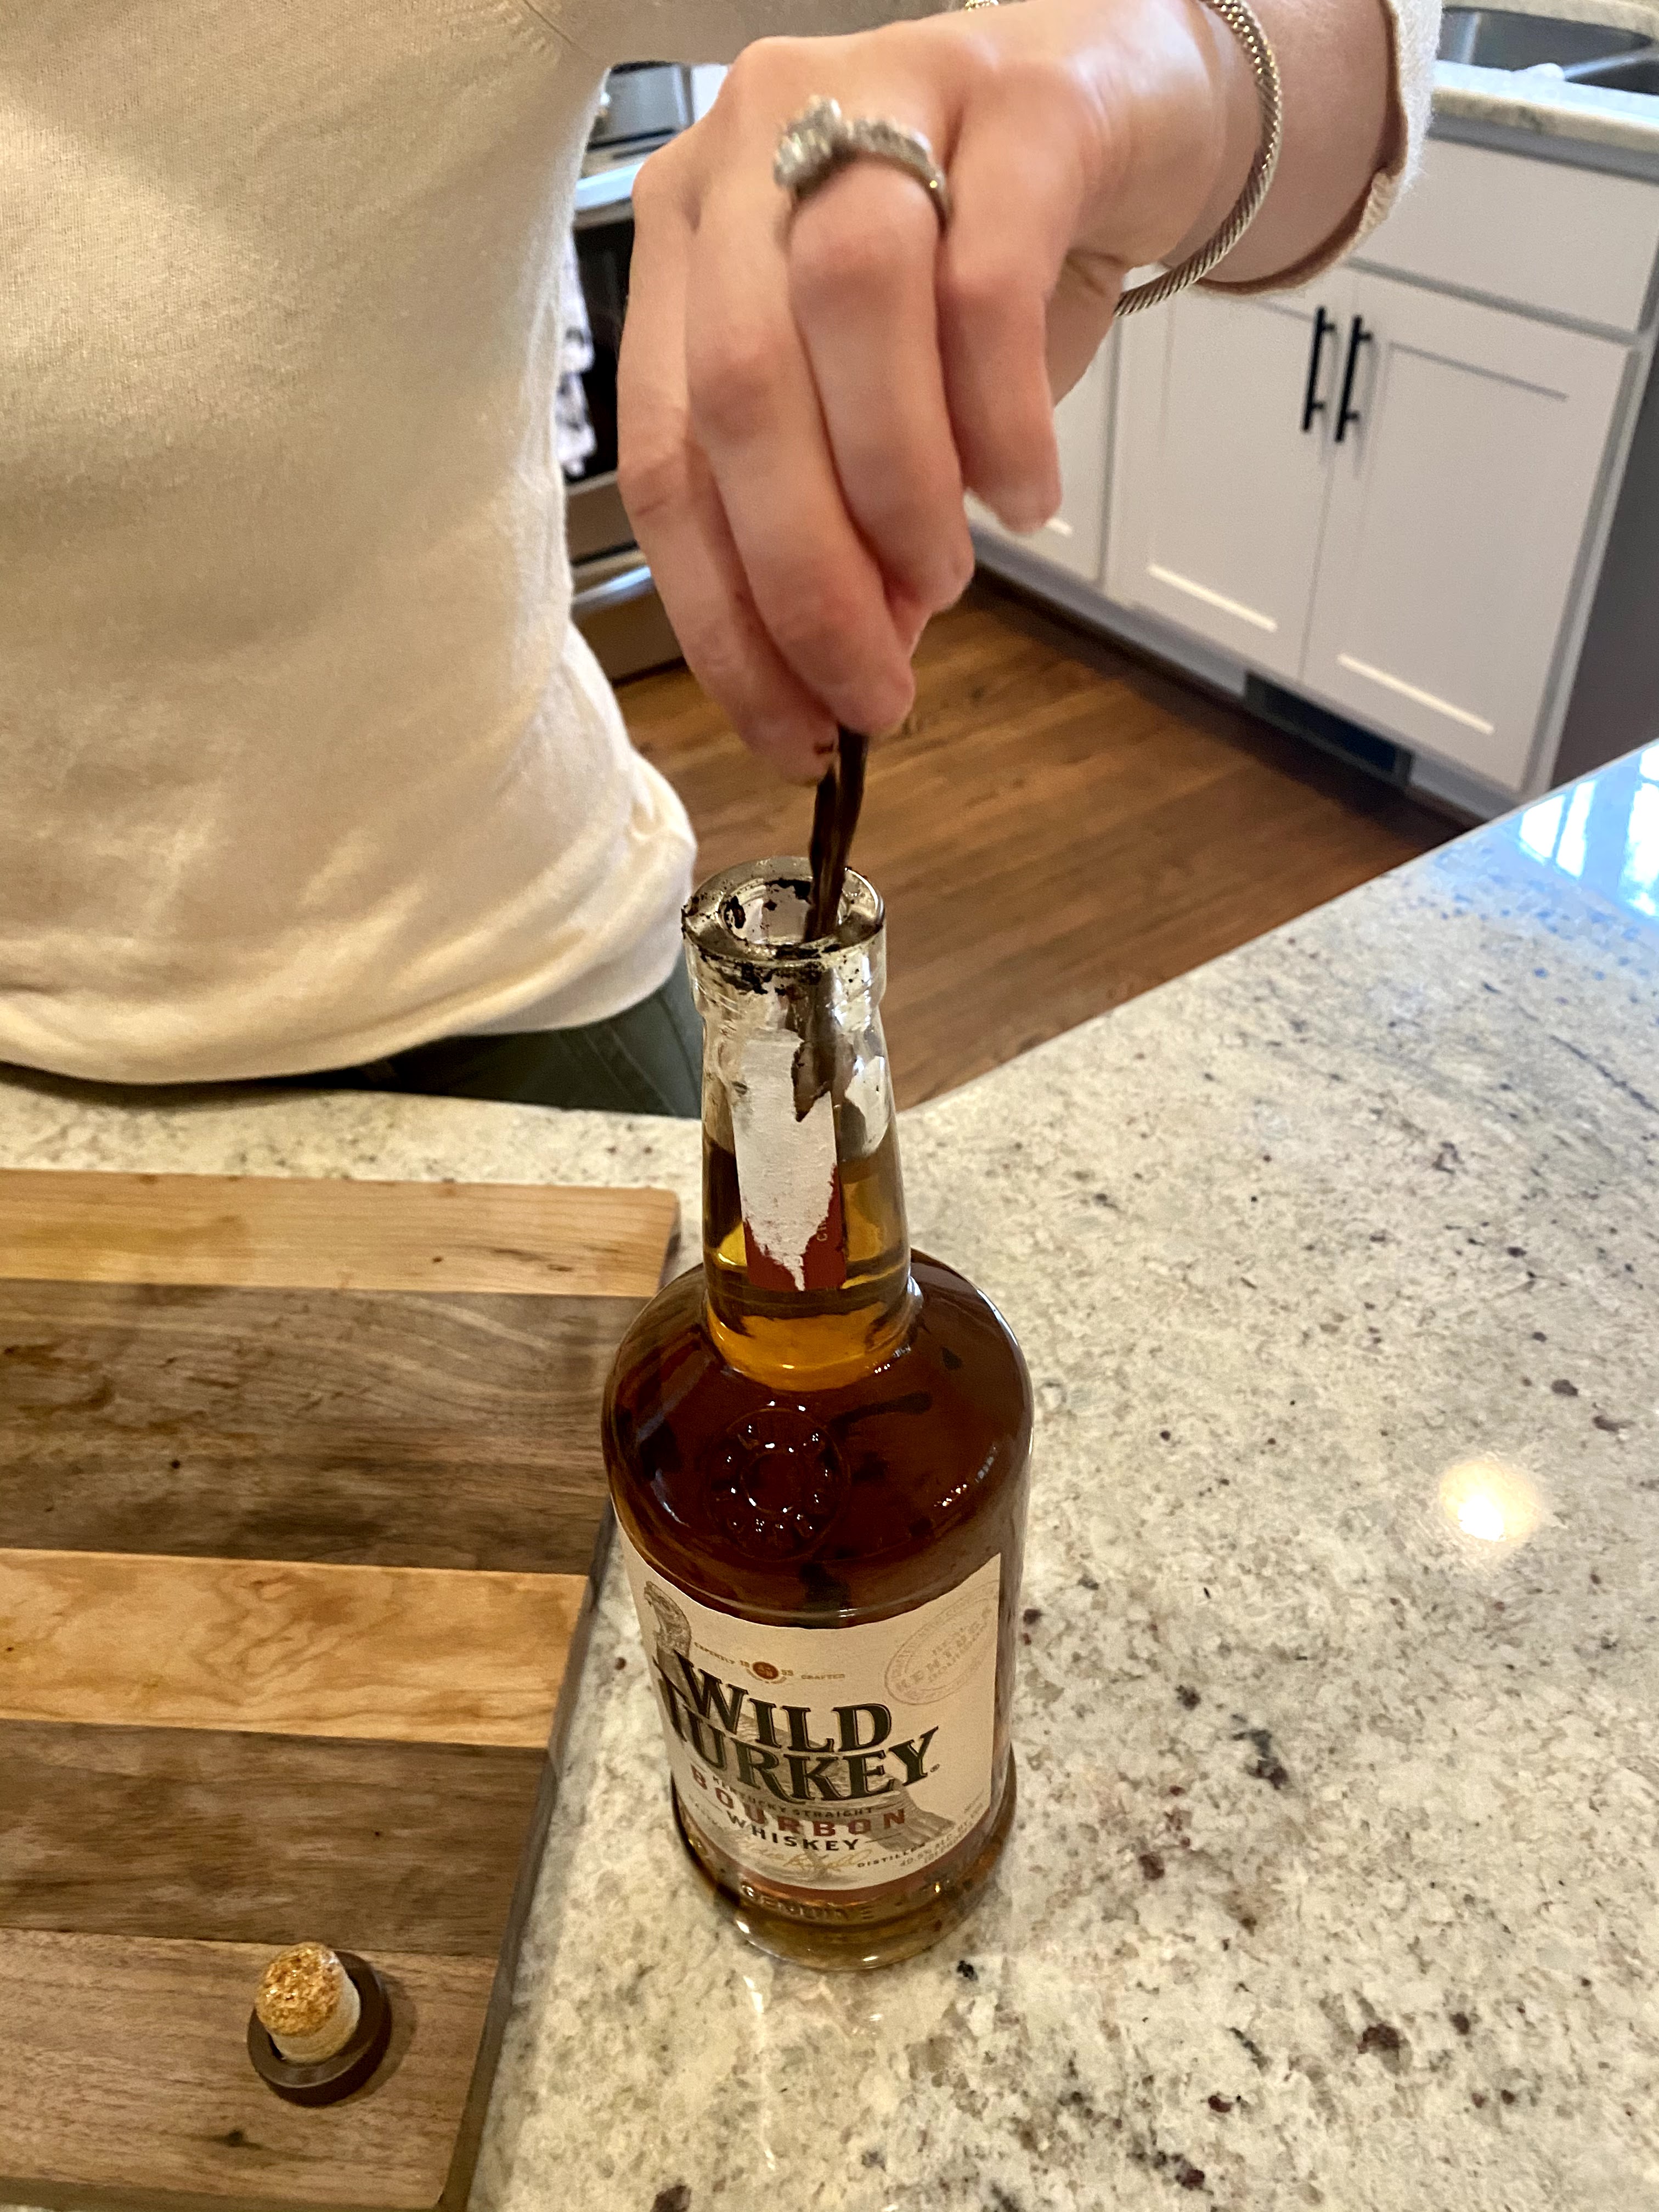
2. Scrape the seeds out of the pod
3. Place all the contents of the vanilla bean (the seeds and the husk) into the bourbon bottle.
4. Let bottle sit for ~3 months prior to using
That’s it! After 3 months of “marinating”, you will have the perfect vanilla bean flavoring which will give all your baked goods that extra special flavoring.
When I was in college, I joined a club that created a quarterly nutrition magazine, and I was given the task of testing different curry recipes. I really didn’t have much extra money, so I took my last $30 of the month and bought groceries to try those recipes. Well, for whatever reason, the editor didn’t like my work. She nixed it and wrote the article herself.
Needless to say, I developed an aversion to curry after that.
Flash forward a few years and now I’m married a guy who loves food- all kinds, all ethnicities, (except black olives). Durham has a big food scene and Will always wants to try new restaurants. He’s even dragged me to a few Indian places but I still wasn’t sold.
Well, quarantine changed me. (Just kidding! It’s not that dramatic.) For whatever reason, I got an inkling to try a butter chicken recipe a few months back and I fell in love! I made it a few times, tweaked it bit by bit, and ended up with the perfect recipe.
As a Dietitian, I am always looking to create healthier alternatives. I played around with the ratios of chicken and spices until I finally came up with this beauty. This dish still tastes just as good without full-fat products and even without using butter (which is usually the key ingredient to any butter chicken recipe). I love it paired with some jasmine rice or some toasted Naan bread!
Recipe:
Ingredients:
3 chicken breasts (about 2.5 lbs)
1 small yellow onion
1 tsp minced garlic (or 2 cloves, minced)
1 Tbsp ginger paste or fresh grated ginger
2 tsp curry powder
1/2 tsp turmeric
1 can (6 oz) tomato paste
1 can (14 oz) lite coconut milk
6 oz fat-free plain Greek yogurt
Cilantro for garnish
Instructions:
Cook chicken with preferred method (I usually just broil mine until the internal temperature reaches 165 F). Once cooked through, cut up into bite sized pieces.
Dice the onion and sauté it in olive oil until it turns clear.
Add in garlic, ginger, curry powder, and turmeric. Cook for a minute.
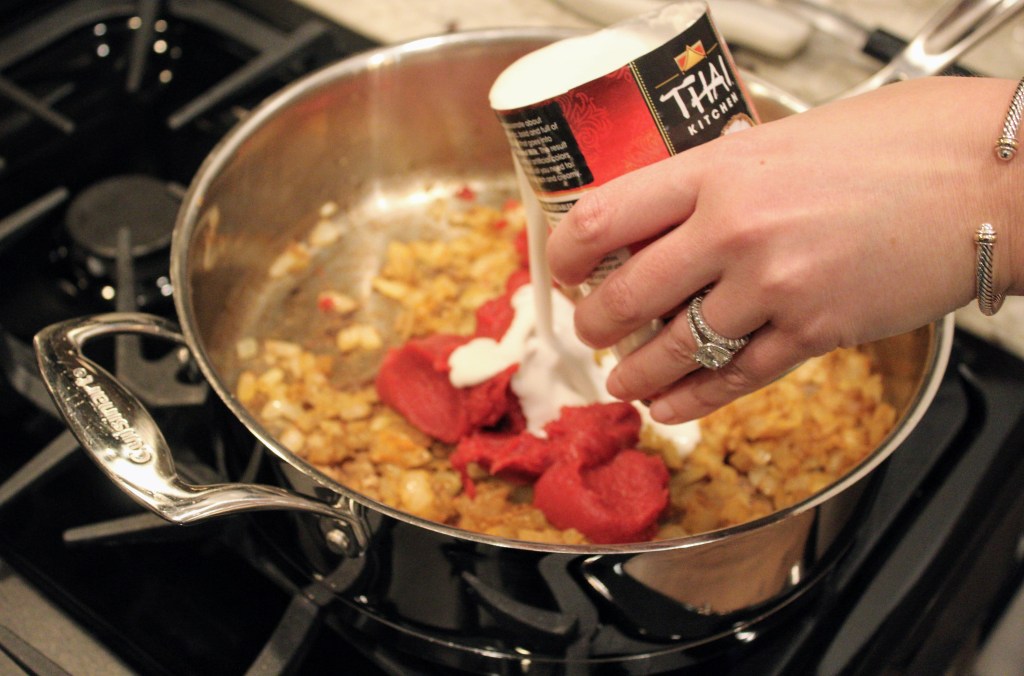
Stir in tomato paste and coconut milk. Let simmer for ~5 minutes.
Stir in Greek yogurt. Once mixed through, add in chicken. Let simmer for another ~3 minutes.
Serve over rice and top with chopped cilantro
Yields: about 6 servings
Nutrition facts per serving: 300 kcals / 50 g protein / 9 g carbs / 6 g fat / 162 mg sodium
It’s no secret that I love dogs. Especially my dogs. And it’s no secret that my entire world revolves around them. We moved into our current house solely because our dog at the time (Bella) kept jumping over the fence at our old house, and we needed a house with a 6 foot fence.
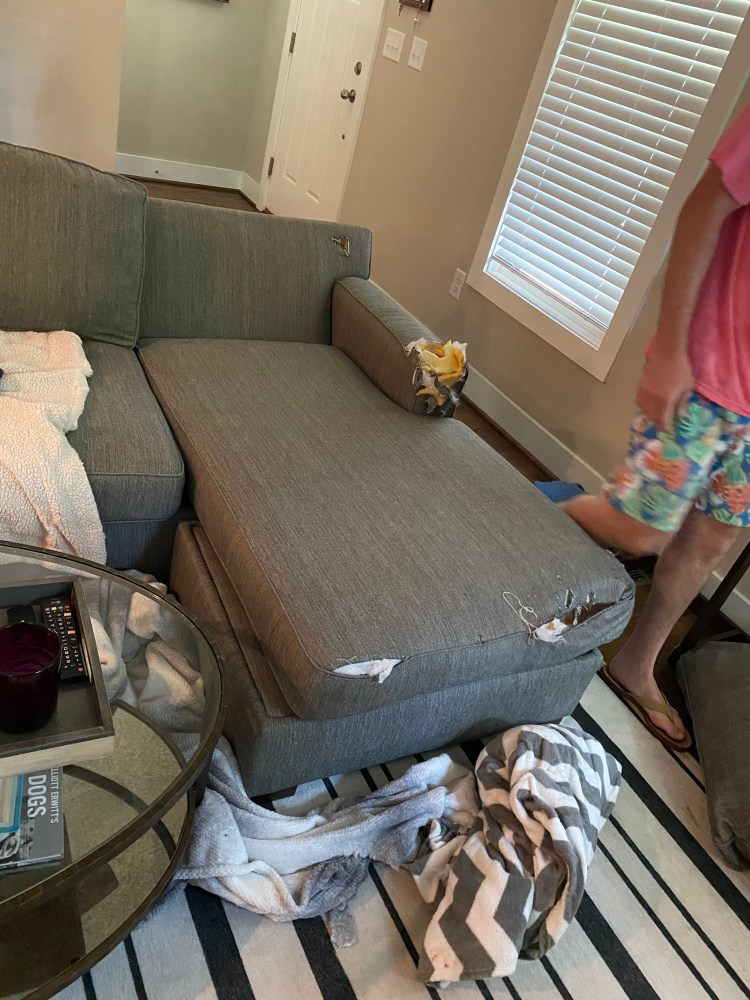
When “quarantine” happened, Will and I did what every other stir-crazy couple did: we looked at new houses. Specifically, we looked at new houses with dog rooms (a tiled room off the kitchen that our dogs could eat and sleep in, and go to when they were muddy). As much as I love our fur babies, I also came to realize how much of a burden they were becoming to my clean house (case in point: our destroyed Potterybarn couch).
We found a few good contenders, and then looked at our bank account – no new house for us! That’s when we started looking at what we could do to upgrade our current space.
Our house already had a mudroom that two of our dogs (Alice and Ca$h) slept in at night. We figured if we pulled out the bench we would be able to fit Bella’s crate and allow for all 3 dogs to sleep in there. Of course, I didn’t stop with just that….
Unfortunately we lost Bella halfway through the construction. Not a day goes by that I don’t miss her. She would have loved her new “place”! Here is a before picture (with Bella and Alice, patiently waiting for their breakfast).
Honestly, it was a great mud room, and would have been perfect if we could have actually used it for a mud room. But, I think homes need to be just as functional as they are aesthetic – so we decided to change it.
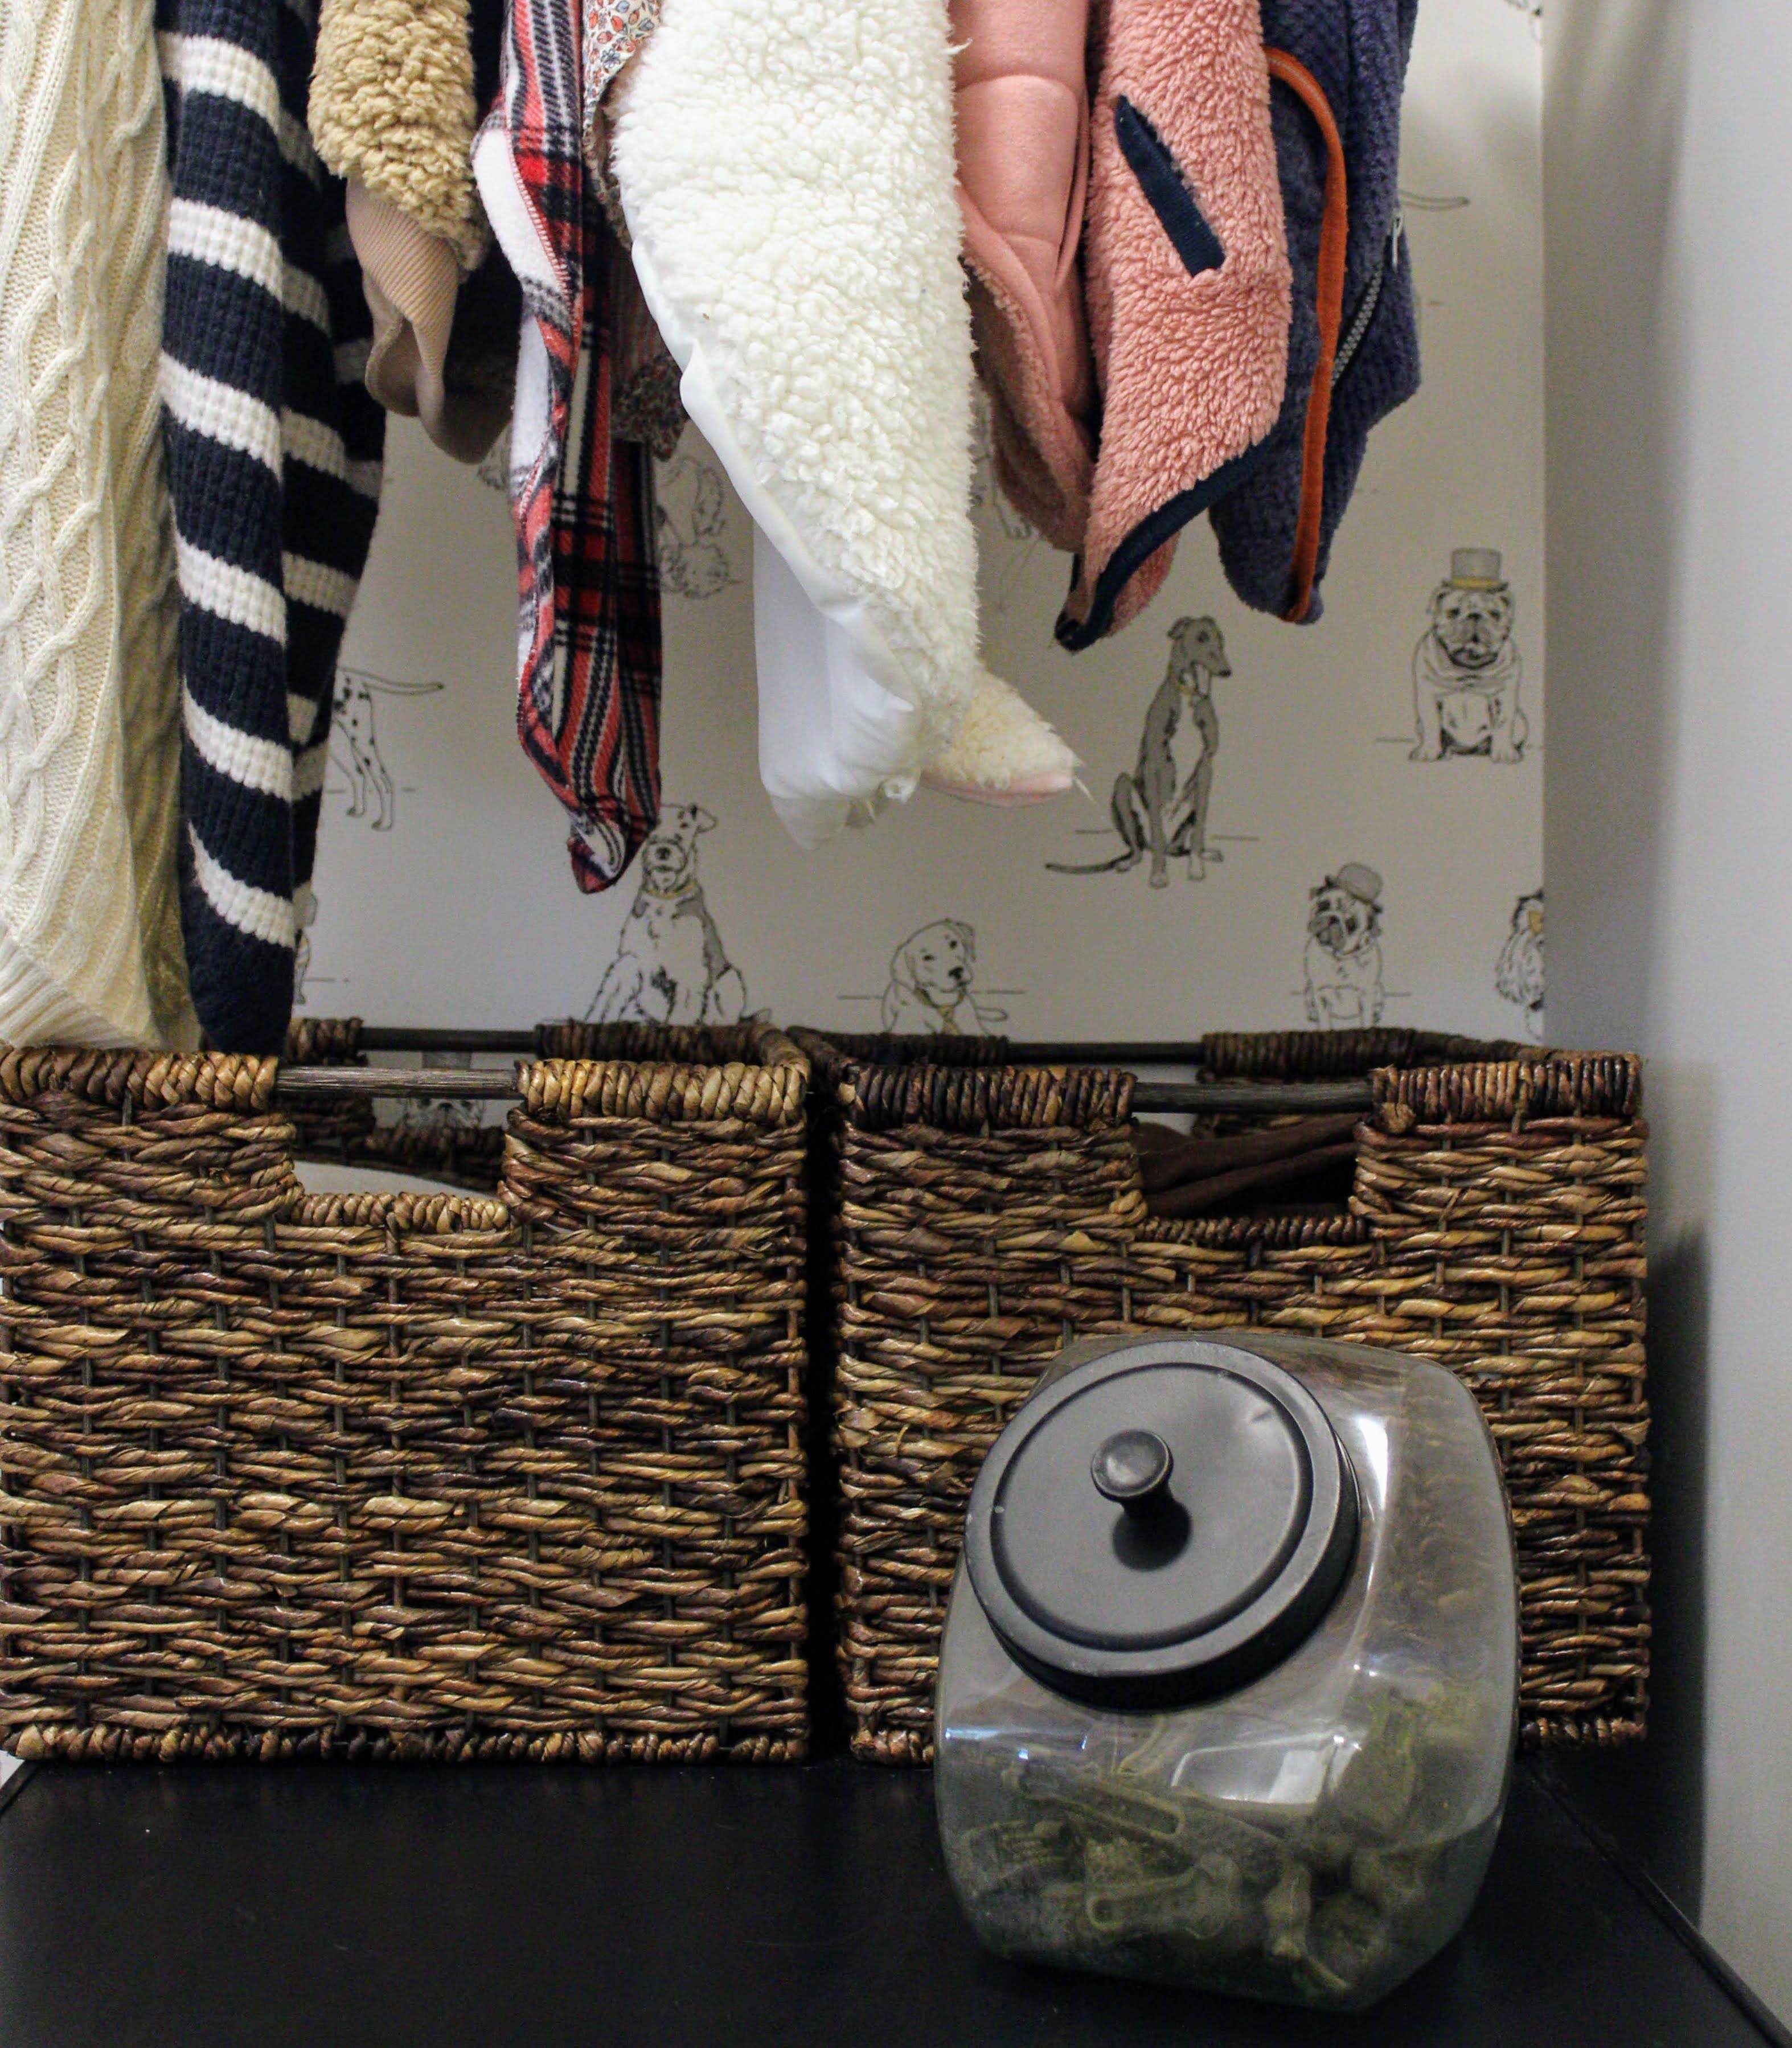
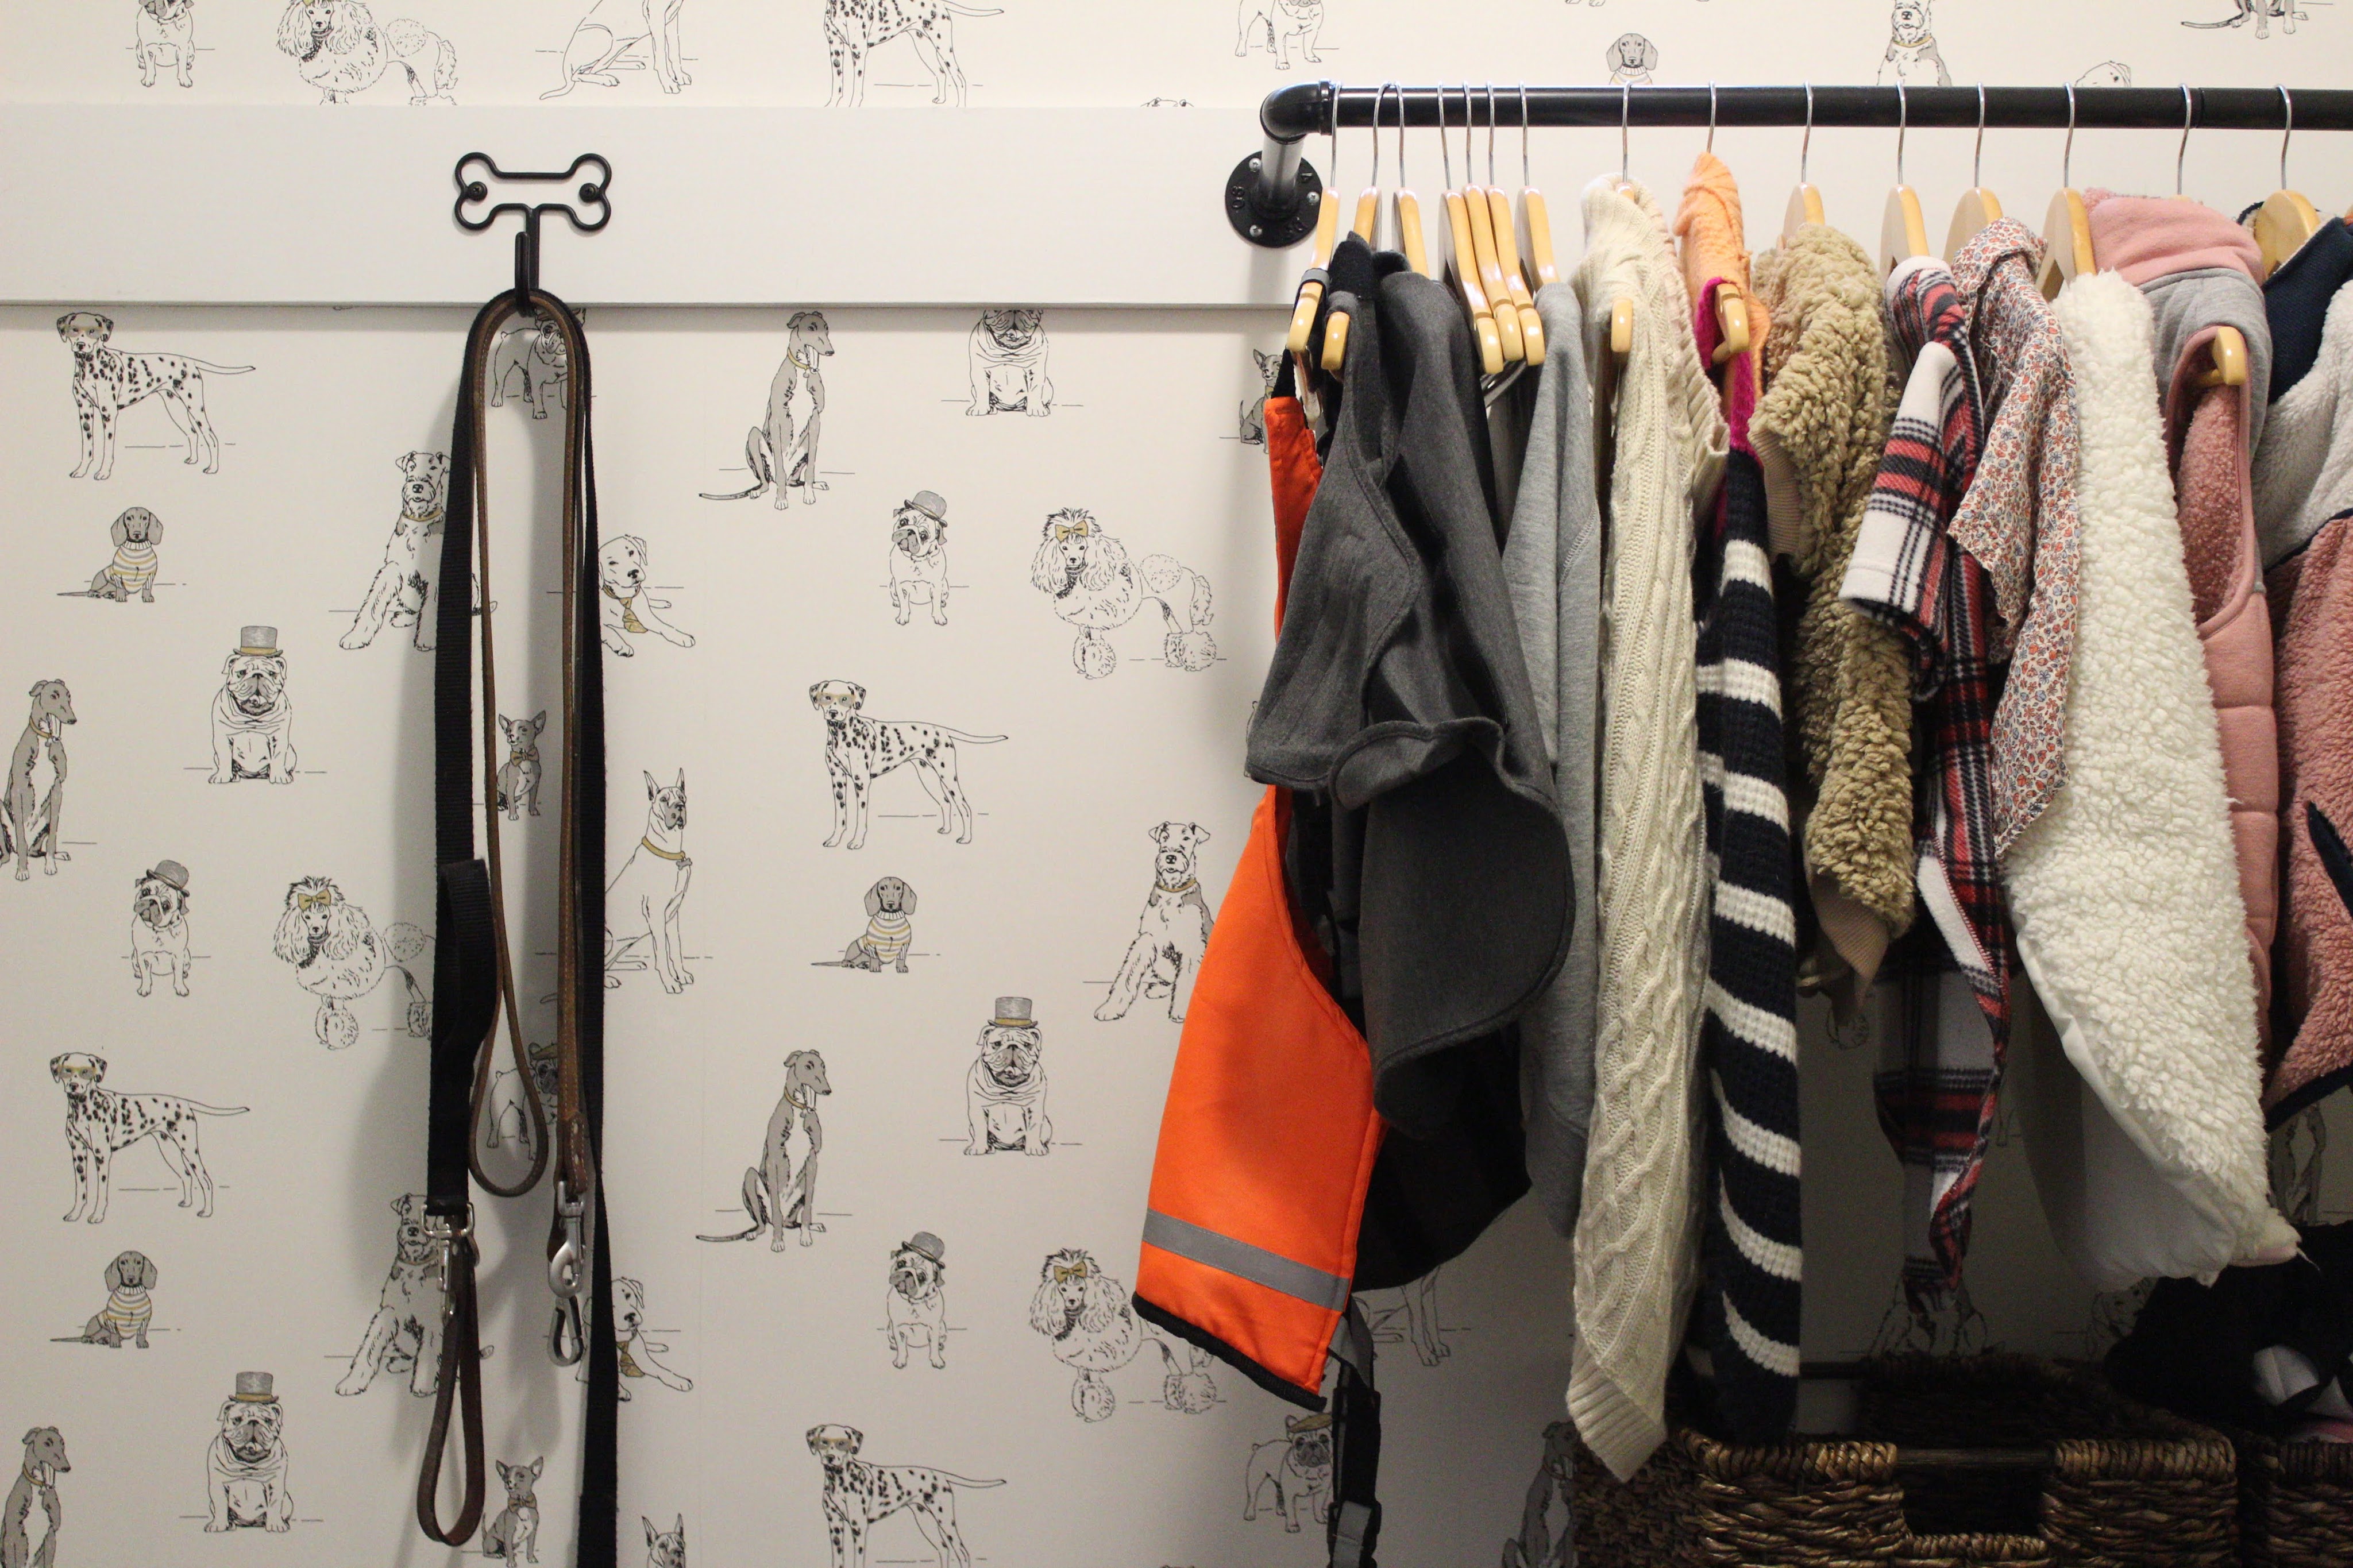
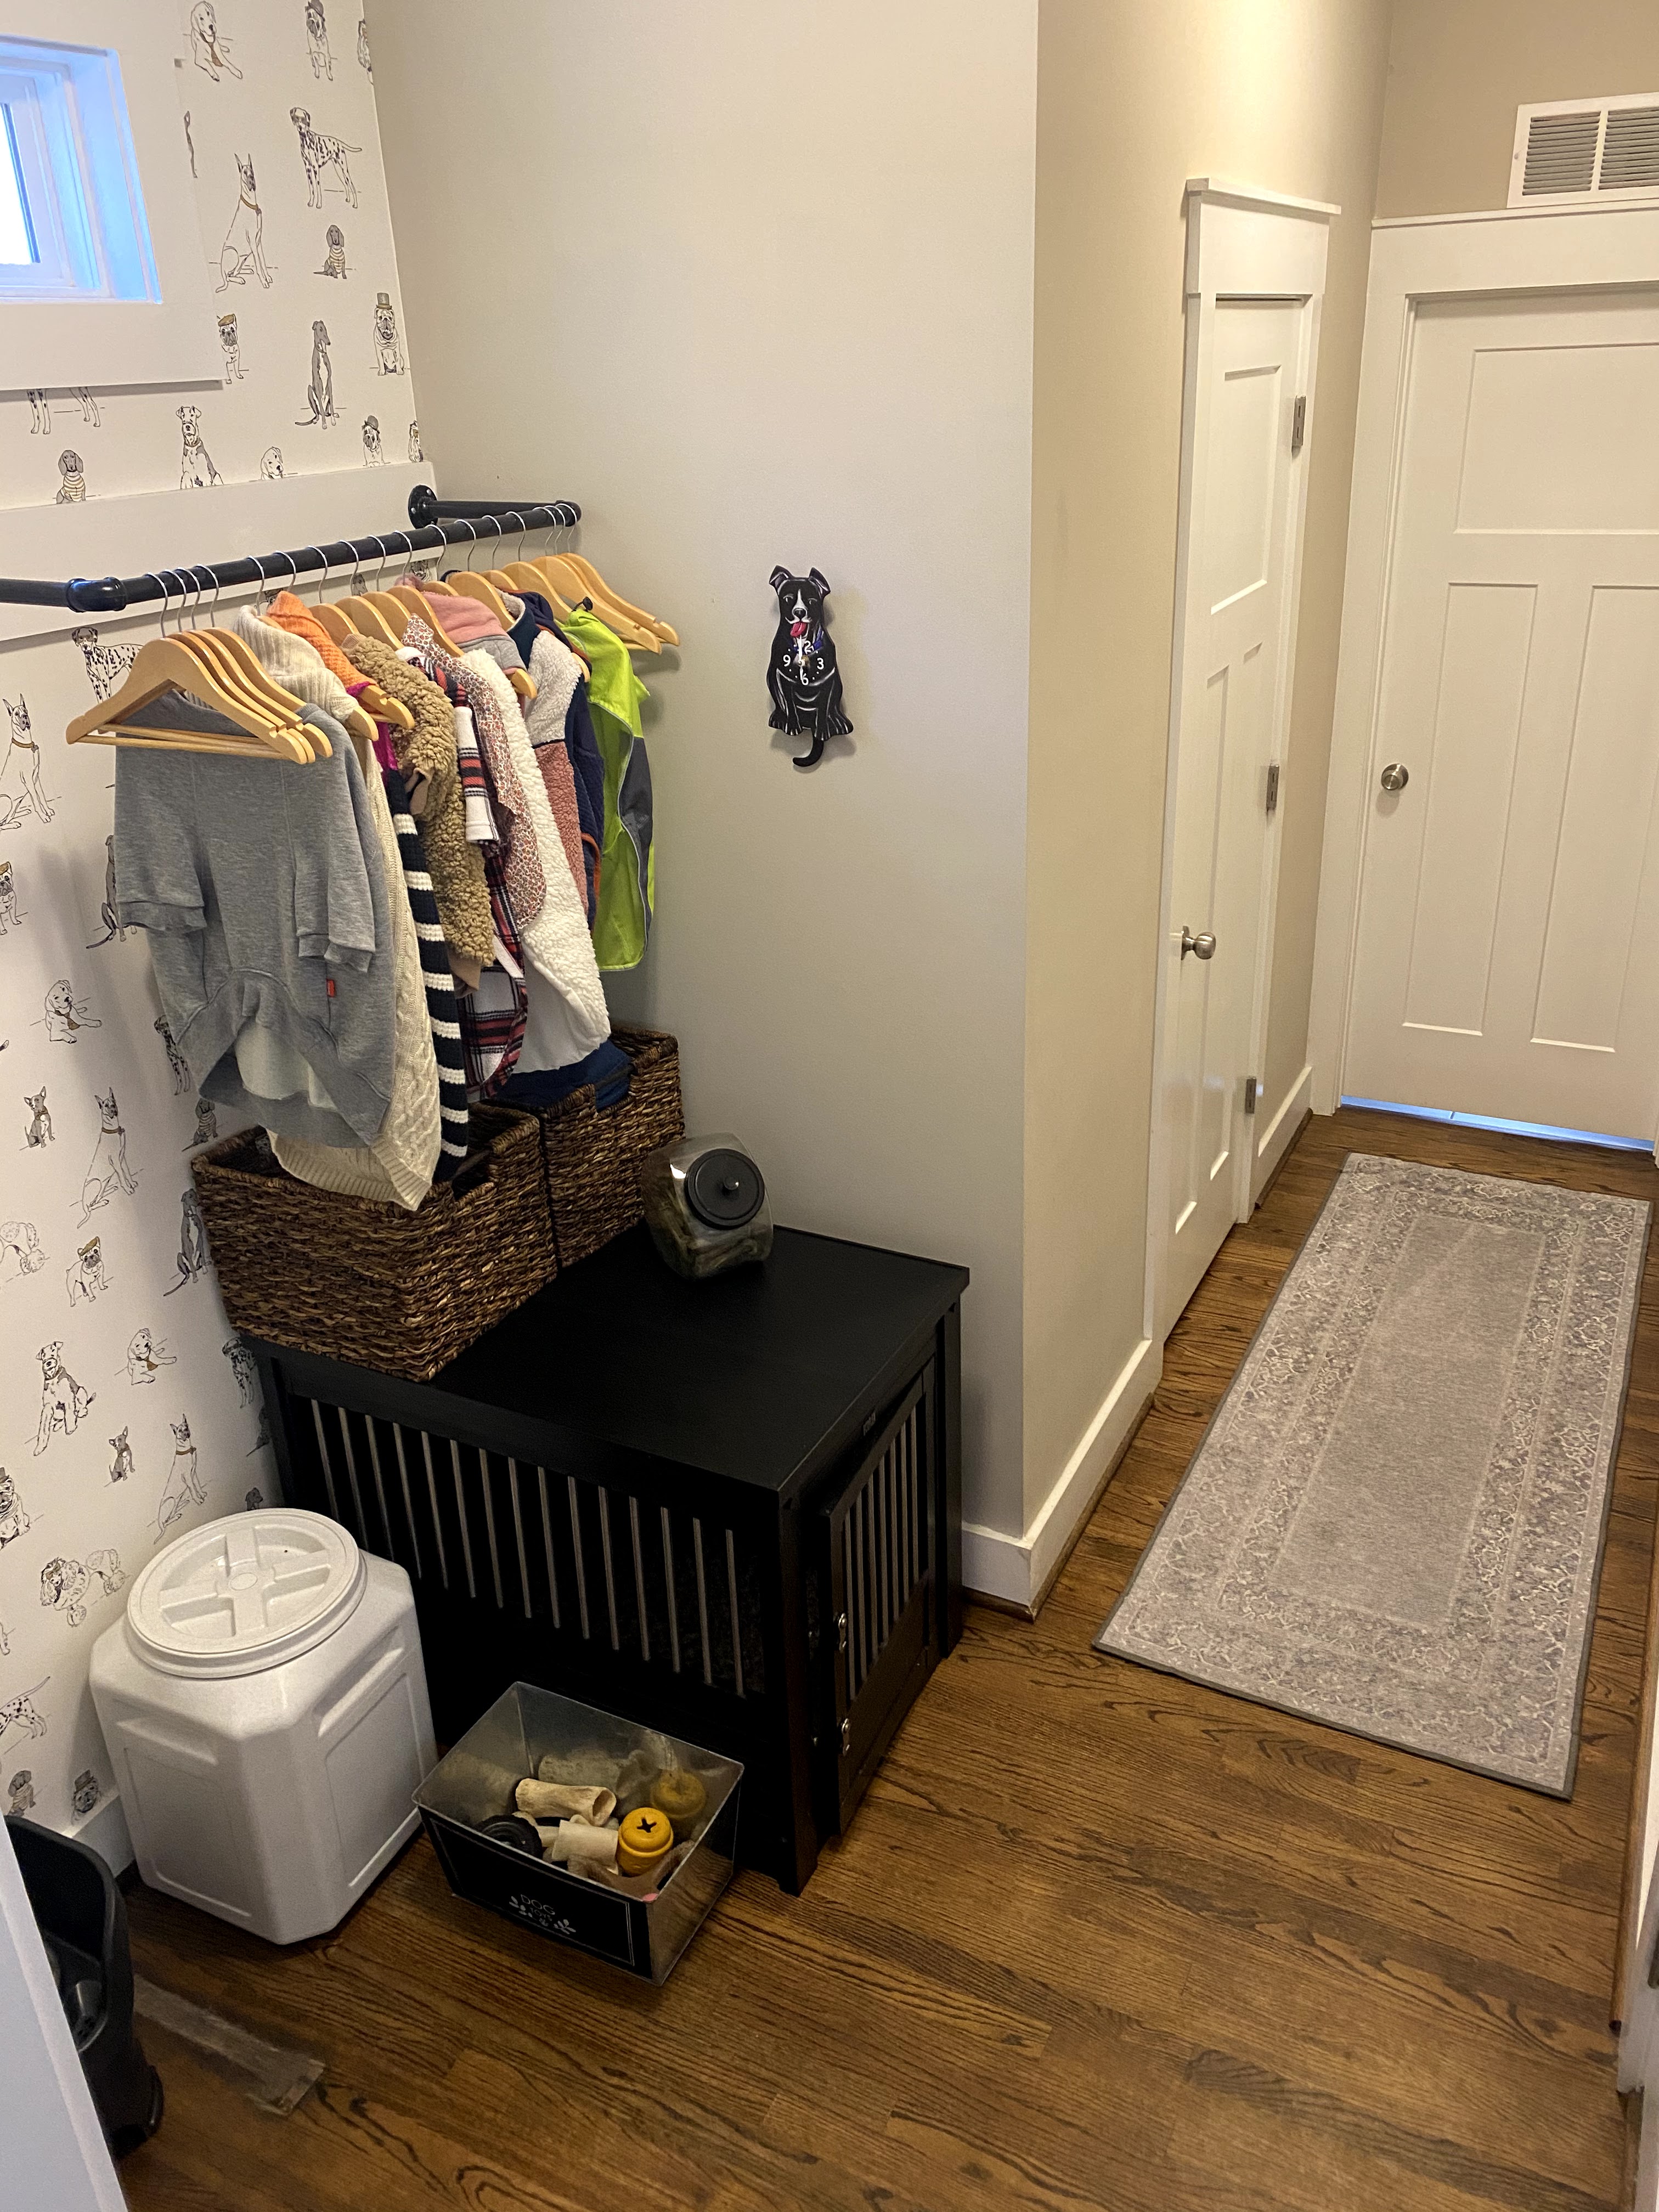
After pulling out the mudroom bench, we had the walls painted and then this dog wallpaper put up. Of course, we couldn’t have a dog room without a dog “closet” to hang up all their outfits! I found this clothes rod and wooden hangers from Amazon. Down the hallway we put a Ruggable runner – a staple in our home, and a necessity if you have lots of dogs (or kids, for that matter).
The less glorious part of the room includes the new eco flex crate – a bit more upscale than your typical wire crate. We also upgraded the dog water bowl to the Neater Feeder – if you have messy dogs and want to preserve your paint/wallpaper, this is a necessity (I am speaking from experience here…) And last, we grabbed a few baskets to throw all their random things in and keep the area neat.
And there you have it – the ultimate dog room. Now we have a space to store all of our dog items as well as keep the dogs when they are muddy or sleeping at night. It’s the perfect combination of fun and function!